If you are interested in constructing a new terrace or revitalizing your existing one, you can access tips and information from our informative articles, manuals, and instructional videos. You will learn about the essential aspects of constructing a terrace.
Constructing your own terrace – what’s important
When considering building a terrace, it is important to take various factors into account, as with any construction project. Begin with thorough planning to visualize your future terrace clearly. It’s crucial for the terrace to not only complement the house and garden aesthetically but also for the size, alignment, and materials to be carefully planned. Afterwards, you can proceed with constructing the terrace: preparing the ground, creating the substructure, laying the base, adding suitable edging if necessary, and customizing the terrace according to your preferences.
Terrace planning
Before commencing construction of the terrace, there are several key elements to ponder. Comprehensive terrace planning typically encompasses the following:
Orientation
Dimensions
Layout of the panels
Surface covering for the panels
Style and design
Privacy provisions
Sun protection
Availability of water connections
Power supply
Options for terrace coverings range from wooden or WPC decking to concrete slabs and pavers. It’s important to plan for a slope to ensure proper drainage of rainwater.
Constructing an affordable terrace
Though constructing a terrace can be costly, there are methods to reduce expenses. The most significant expenditures are associated with custom or large terrace shapes, terrace coverings, and the materials for the base. Additional costs can include labor and equipment expenses.
The good news: These cost aspects also present opportunities for savings. For instance, opting for a simple terrace shape, reusing existing materials, and selecting a cost-effective yet durable terrace covering.
Terrace construction – base & substructure
The substructure serves as the foundation of the terrace, providing support and stability. Especially for wooden decks, a substructure is essential as it prevents moisture absorption and rot. Therefore, building a terrace directly on grass is not advisable. It is necessary to prep the ground with a substructure that can support the base.
Depending on the type of substructure, a concrete foundation or a level surface comprised of concrete slabs can be utilized. A gravel layer can be created by excavating the soil and filling it with gravel and chips. The substructure should already have a slope away from the house so that rainwater can drain effectively.
Constructing a wooden deck
Essentially, constructing a wooden deck involves three main steps:
Creating the substructure
Installing the base
Placing the wooden floorboards
The most common substructure is made of concrete chips and slabs. A wooden deck can be constructed on support posts, support pads, or existing patio slabs or pavers. Wooden floorboards can be crafted from wood varieties such as Bangkirai, Douglas fir, or larch. Douglas fir and larch are known to be cost-effective wood options for building a deck. Bangkirai is a tropical wood that is slightly pricier but highly weather-resistant.
Constructing a WPC deck
WPC decking necessitates a substructure to which the decking rails are attached. The boards are then affixed to these rails. An aluminum substructure is recommended for WPC decking due to its excellent weather resistance. The construction of a WPC terrace follows the same steps as any other terrace, followed by laying the appropriate substructure profiles and WPC boards.
By the way: WPC stands for wood-plastic composite and combines the attributes of both materials: WPC decking is as durable as hardwood and as easy to maintain as plastic.
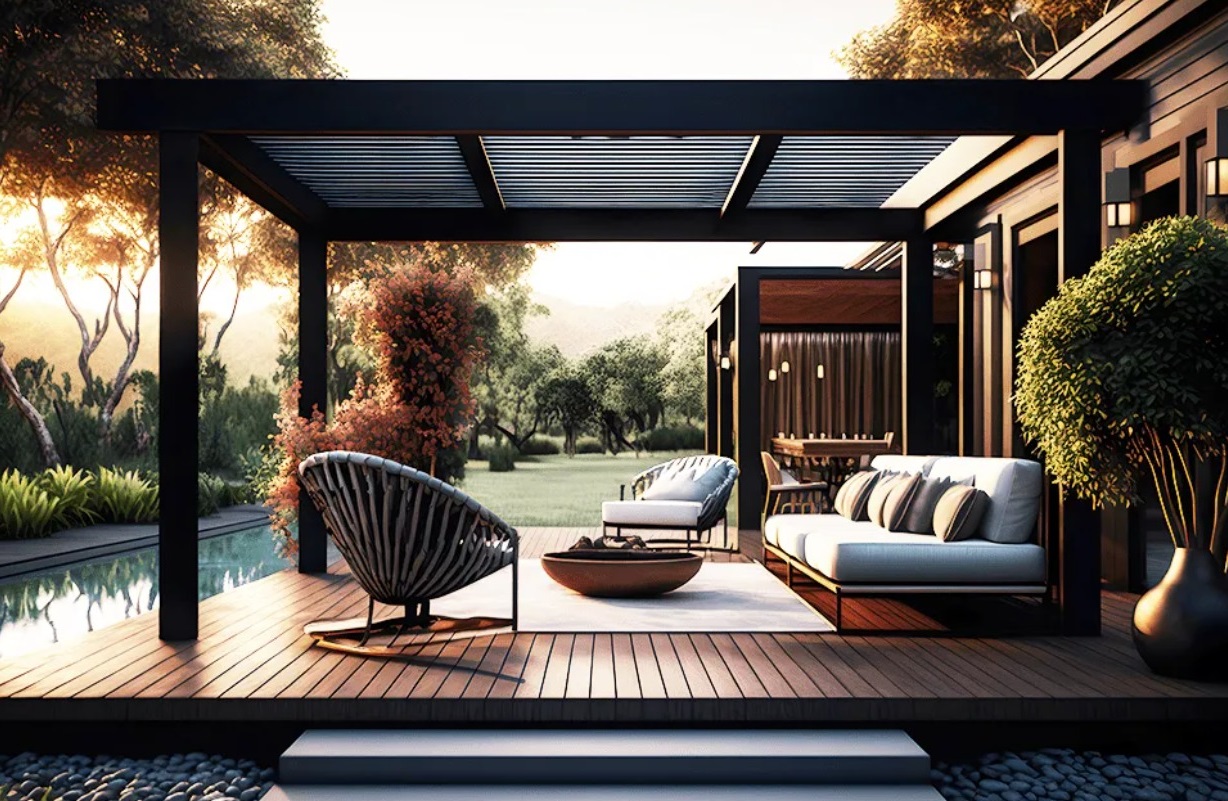
Constructing a terrace – suggestions
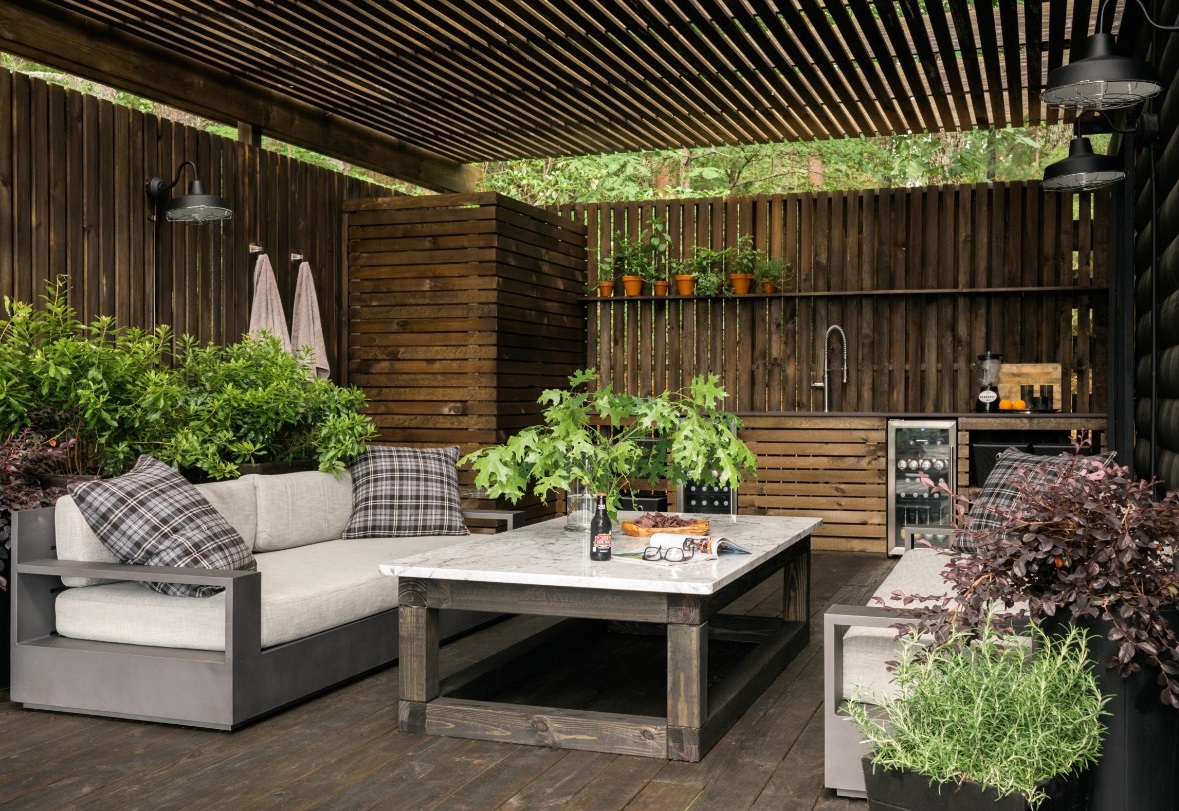
You have a multitude of choices for designing your terrace. Starting with its layout: it can be linear or curved. Once the terrace is constructed, you have the freedom to customize it to your liking. For instance, you can install sun protection such as an awning or terrace cover, or erect a privacy screen. The terrace can also be tailored to match the surrounding garden, whether you prefer a modern or Mediterranean style. In terms of covering, there are various options including wooden or WPC decking, terrace tiles with different designs, modular tiles made of wood or WPC, and many others. With the right terrace covering layout, you can visually create the illusion of a larger or smaller terrace.
FAQ – Common queries relating to “constructing a terrace”
How do you construct a terrace?
A terrace requires a sturdy foundation and substructure. Only then can the terrace covering be laid. Here are the individual steps involved in constructing a terrace:
Mark out the area and excavate, ensuring to establish the slope!
Lay down a layer of gravel and compact it using a vibrating plate.
Apply an even layer of chips and level it.
If necessary, construct a substructure for the decking.
Place pavers, terrace slabs, or decking boards.
The cost of building a terrace depends largely on its dimensions and shape, as well as the materials used. A straight terrace is cheaper than a curved one, and a small terrace is cheaper than a large terrace. Therefore, the cost can range between €70 = 77.8 USD and €150 = 166 USD per square meter. If a foundation is needed, it will cost between €30 = 33.25 USD and €50 = 55.4 USD per square meter.
What is the surface of the terrace like?
A terrace surface should be level and sturdy to provide adequate support for the substructure and covering. Depending on the type of substructure, a concrete foundation can be poured, or a flat surface can be created using a concrete slab. For a gravel layer, start by excavating the ground, then fill it with gravel and chips. The substructure should already have a slope away from the house to allow rainwater to drain away.
Can terrace tiles be laid directly on the ground?
While paving slabs can be laid in the garden on compacted soil, terrace slabs require a stable base. To achieve this, mark the area with string nails, stretch a guide line, dig the ground, and compact the area with a vibrating plate. Apply the mineral mixture on the ground in multiple layers, compacting each layer.
If the terrace is directly adjacent to an open house wall, the next step is to install a dimpled membrane to protect the house wall from moisture. Then build a fence, for example, a stone fence. Next, add a smooth, even layer of chips, which should be evenly removed using a scraper bar and a ruler. Only then should the terrace tiles be installed, using spacers. The joints should be filled with jointing pieces, the panels should be tapped into place with a rubber mallet, and finally, the jointing pieces should be coated with water.
How much gravel is needed under the terrace?
For terrace slabs, a compacted gravel layer about 20 cm thick is required, followed by 4 cm of sand. The exact amount of gravel and chips required depends on the specific project, regional weather conditions, and the thickness of the terrace covering.
What slope should a terrace have?
A terrace should have a 2% slope, meaning a slope of 2 cm per 1 m. The slope should be away from the house. The area should be cleared and the slope checked again when adding gravel and chips. Rainwater can only be drained off the terrace with a proper slope, protecting the house walls and the terrace from moisture.
How many square meters should a terrace have?
The size of the terrace depends on the number of people it should accommodate. For two people, a terrace should be at least 6 m2, and for five or more people, an area of around 24 m2 is recommended. Consider whether space is needed for a grill, sun loungers, or outdoor furniture.
How much does a 30 square meter terrace cost?
Based on costs of €70 to €150 per square meter, a 30 m2 terrace can cost between €2,100 and €4,500.
How much does a 20 square meter terrace cost?
Based on costs of €70 to €150 per square meter, a 20 m2 terrace can cost between €1,400 and €3,000. Additional costs may include machinery, equipment, and accessories such as awnings, terrace covers, privacy fences, garden furniture, and plants.
How large can a terrace be without a building permit?
In most regions, a building permit is not required for a terrace up to 30 m2. Some areas have even stricter regulations for permit-free building. Check with the relevant state building authority for regulations in your area. Similar regulations apply to roofs.
Terrace planning – tips
How to plan a new terrace?
Whether building a new terrace yourself or with professional help, start by outlining the most important aspects in the terrace plan. Consider future use, such as hosting events or creating a comfortable space for relaxation. The terrace’s orientation toward the south, east, or west will affect the amount of sunlight it receives. For hot summer days, provide shade with an awning or screen, and ensure there is a water supply for garden plants. The more detailed the terrace plan, the better the estimation of wood and building material costs, and the necessary work steps and efforts. The following tips give guidance for individual terrace planning.
When planning your terrace, it’s important to consider the position of the sun. A southwest-facing terrace will receive sunlight from morning to evening, while a terrace on the south side of the house will be flooded with light all day long.
To avoid excessive midday heat in summer, consider orienting your terrace to the northeast. This will provide morning sun for breakfast and cool shade in the afternoon. Alternatively, a northwest location will offer a cool spot during the day and golden light in the evening.
If the orientation is not determined by structural conditions, you can try out sun loungers at different times of the day to see if the chosen terrace location suits your preferences.
The size of the terrace should be determined based on its intended use. For a seating area with six chairs, plan for an area of around 25 m²; for an eight-seater, plan for around 30 m². However, for relaxed gatherings in small groups, a much smaller area will suffice: a sun lounger only needs 3 m², a parasol 2 m², and a table with four chairs 20 m². Don’t forget to include special elements such as a terrace swing or a fireplace in the area calculation when planning the terrace.
To better estimate the size of the area in relation to the entire garden for terrace planning, it’s important to observe the area as a test and design your terrace accordingly.
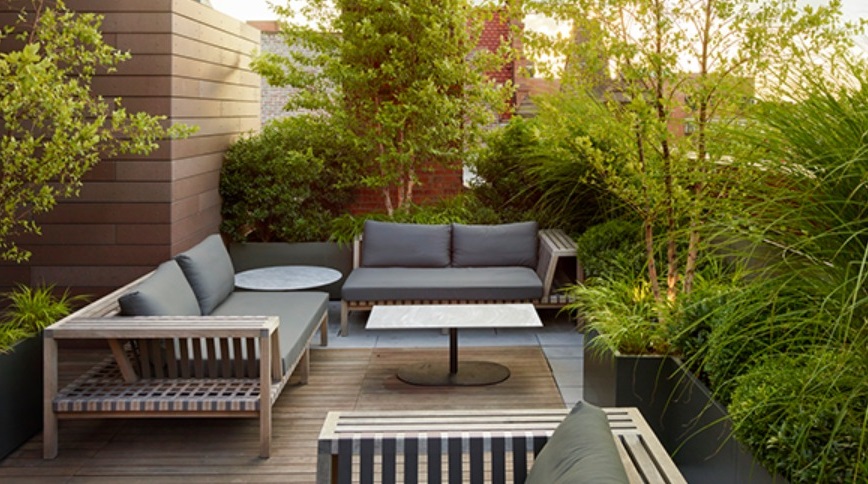
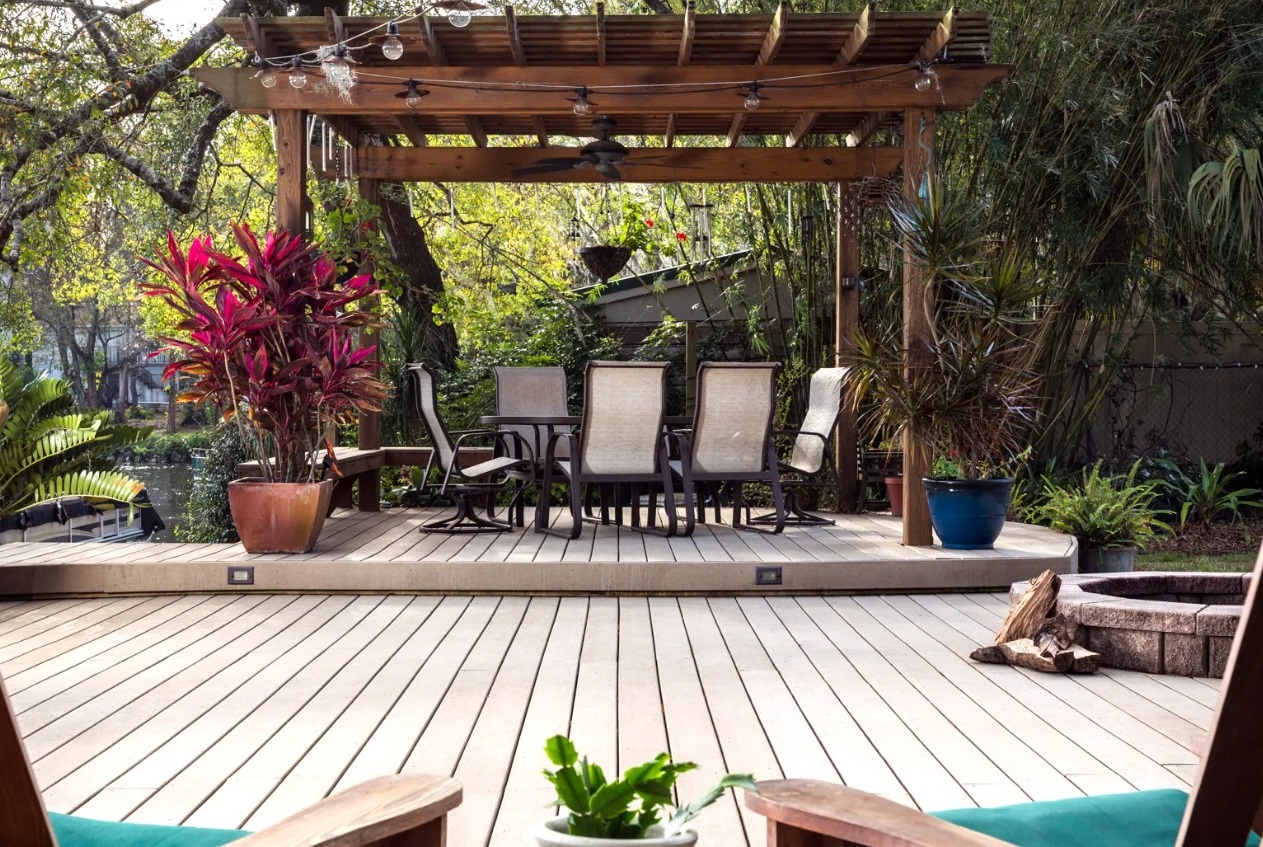
The shape of the terrace will determine its appearance. Straight lines will make the terrace look modern and simple, while curved shapes will make the seating area appear more lively and dynamic. Ensure a clear boundary from the rest of the garden with straight lines, or wisely connect the entrance and exit as well as the garden beds or paths for a harmonious transition between the house, terrace, and garden.
The new terrace should emphasize the style and character of the house itself. Coordinate individual elements with each other at an early stage to create a harmonious overall picture. The use of wood and lush plants will create a natural and homey atmosphere, while large-format slabs or tiles in simple gray or anthracite will appear more rustic and go well with furniture with clear lines and simple elegance. Rustic natural stone flooring with terracotta pots and garden benches will create a romantic atmosphere with a Mediterranean touch.
The choice of terrace covering material is crucial as it underlines the individual style and influences the ambiance in the garden. Consider the character of the house, your design preferences, and future use when selecting the terrace covering material. There are various options, such as natural stone, wood, WPC floorboards, pebble, or click tiles, each with its own characteristics and maintenance requirements.
Consider the surrounding environment when choosing the location for your new terrace. If you value undisturbed relaxation, consider a privacy screen or fence.
Also, take into account the surrounding seating area as part of your planning. Large trees surrounding the seating area provide coolness on hot summer days but increase cleaning effort once their leaves fall in autumn. Adjacent beds can underline the style of the terrace, with different plants contributing to different design themes.
Sun protection Shade plays a crucial role during the summer, particularly on south-facing terraces. It’s beneficial to think about incorporating a summer roof during the planning phase or to explore alternatives like an awning, sun screen, or parasol.
Awnings and other fixed sun protection options need to be considered early on as they require more effort and are more expensive to install. However, a parasol can be added later, but it’s important to plan for the space needed for its stand in advance.
Plan for water connection It’s a smart move to install a water connection when constructing the terrace. This will allow you to easily fill the watering can, connect a hose, or set up an irrigation system to water the plants in summer. Underground pipes can carry the water to different areas in the garden, while drip irrigation can directly hydrate pots, beds, hedges, and shrubs. Additionally, underground sprinklers can ensure the lawn receives sufficient water during the summer, preventing the plants from drying out even when you’re away on holiday.
Ensure access to electricity Lighting plays a significant role in creating an inviting atmosphere on your terrace. Therefore, it’s crucial to incorporate wiring for wall or floor lights, floor spotlights, or LED strips as part of the preparation. Even if electric lighting isn’t initially planned, it’s wise to make provisions by laying two empty pipes under the terrace at the outer corners to simplify future installations. Moreover, solar modules can be added to bushes or privacy screens for lanterns and fairy lights, and torches or candles can be included later on.
Save money when constructing a patio – tips These tips will help you understand how to build a cost-effective patio. Discover the expenditure of building a wooden, stone, or tiled patio, including the cost of installing the foundations at the correct distance from the ground.
What factors influence the cost of building a patio? Creating a seating area in a garden opens up new ways to enjoy the space, but building a patio involves additional costs beyond just materials like floorboards, screws, and potential equipment rental.
The main cost factors for building a patio include:
- The size and shape of the patio
- The patio covering
- Materials for the substructure
Additional factors influencing the cost of your patio include the need for tradesmen services and the required tools and machines.
The following tips will help you identify hidden costs and better estimate the financial requirements for the entire project. They also provide practical strategies to save money during implementation.
- Opt for a simple patio shape
The shape and size of your new patio greatly impact the overall cost of the project. A larger area requires more work and materials compared to a smaller seating space. While there are various design options available, such as oval and curved shapes, straight floor plans are easier to execute and more cost-effective. The exception is a gravel or pebble terrace, where a special pattern is not necessarily more expensive since it doesn’t require an expensive substructure.
- Utilize existing conditions
Conducting a thorough assessment of the existing conditions on-site can help eliminate unnecessary expenses for the terrace. You might be able to repurpose an existing terrace base, which reduces the amount of work, conserves materials, and saves costs. For instance, if you have a wooden terrace already, it may be practical to replace the floorboards and address any damage like moisture in the substructure to achieve an entirely different overall appearance. Therefore, carefully evaluating your personal preferences and the building conditions during the planning stage is worthwhile.
- Consider the longevity of the coating
The price of the terrace per square meter depends on the materials chosen and the substructure construction. Choosing higher quality building materials and a stable base generally increases the overall project’s durability, making the higher initial investment worthwhile in the long run.
The best approach to selecting the appropriate flooring and foundation is based on your specific needs: If you need to quickly and affordably create a new area for relaxing or entertaining, a larch or Douglas fir floor is the ideal choice. For a wooden terrace, WPC boards or durable hardwoods such as bamboo and bangkirai are more resilient and robust.
For a stylish seating area where frequent gatherings or large barbecues are planned, it definitely makes sense and is cost-effective in the long term to build a terrace using high-quality porcelain stoneware in a bonded construction. Wooden terraces are less suitable for this purpose due to their lower resistance to moisture. Therefore, it’s advisable to consider your future plans and usage when calculating for your terrace.
- Accurately calculate the quantity of materials
Once the dimensions of the planned terrace are outlined, it’s important to calculate the necessary materials for the substructure and flooring accurately. Moreover, special mortars may be necessary for laying tiles, paving stones, stones, or concrete slabs. When determining the quantity, it’s crucial to consider the waste of building materials.
The more precise the measurement of the quantity, the more likely it is to avoid excess and subsequently reduce costs. Additionally, for consumables such as screws or dowels, it’s recommended to adjust the package size or quantity based on the calculated requirements. The OBI garden planner can assist in calculating the quantity needed.
- Rent equipment
To ensure that the project progresses without delay, it’s essential to have the required machinery and equipment available for each stage of the work. If you don’t have a drill or vibratory plate in your workshop, you may be able to borrow them from relatives, friends, or neighbors.
If additional equipment is needed, it may be beneficial to rent it for the terrace construction. Assessing the purchase price, duration of use, and potential future use in other projects can help in making a cost-benefit analysis.
- Plan for delivery and storage
Incorporating the surroundings of the new terrace construction in the early planning stages can save money, time, and effort. For example, it’s crucial to designate the delivery location for building materials and plan for their storage, as well as coordinate with suppliers. Sufficient space should be available for processing the materials.
Facilitating easy access to the construction site can also save time during delivery and removal. If heavy stones or substructure sand need to be transported a considerable distance to the construction site, it will delay the entire process and increase the terrace’s costs if construction experts are involved.
- Evaluate your own skills
To ensure the successful completion of the new terrace construction without incurring additional costs, it’s helpful to realistically assess your own craftsmanship abilities. Before starting the construction, it’s advisable to educate yourself about all stages of the work and their associated requirements. This will help in planning which aspects require the assistance of friends, family, or experts.
Mistakes or poorly executed work during the construction process can sometimes lead to significant consequences and higher costs. Therefore, it’s not worth cutting corners when it comes to helpers and specialists. FeasibleMakers*, for instance, can provide support during implementation and can be hired for specific tasks within your project.
- Reuse excavated soil
You can store leftover construction materials, such as soil from excavating a terrace area or wood remnants, for later use in other garden construction projects. Aside from a wooden terrace, you can later create pathways, walls, or ponds with these materials. This approach saves on the cost of moving, disposing, and purchasing new materials. Additionally, storing small items like screws is advisable, as they are often needed for minor tasks.
Substructure for wooden terrace: Key considerations
A wealth of helpful information on building a substructure for your wooden terrace can be found in this guide. The structure must be sturdy, durable, and expertly built to safely support the terrace, furniture, design elements, and people for many years. Learn more!
Reasons for substructure requirement for a wooden terrace:
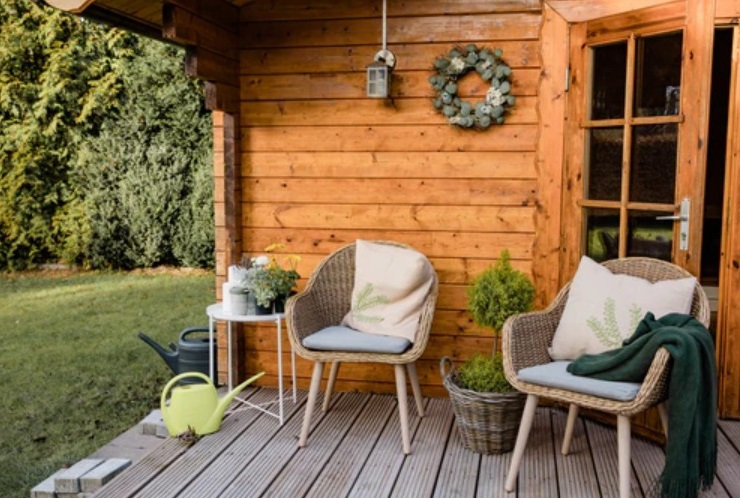
A wooden terrace provides a natural ambiance, homey comfort, and a pleasant underfoot sensation. It exudes comfort and is easy to maintain with proper and regular decking care.
The longevity of your wooden terrace depends, in part, on the substructure, the foundation of every terrace. Only with a correctly and neatly built substructure can your wooden terrace offer years of enjoyment. Otherwise, damage and stability issues might arise quickly. We will explain what to consider when planning and constructing the substructure.
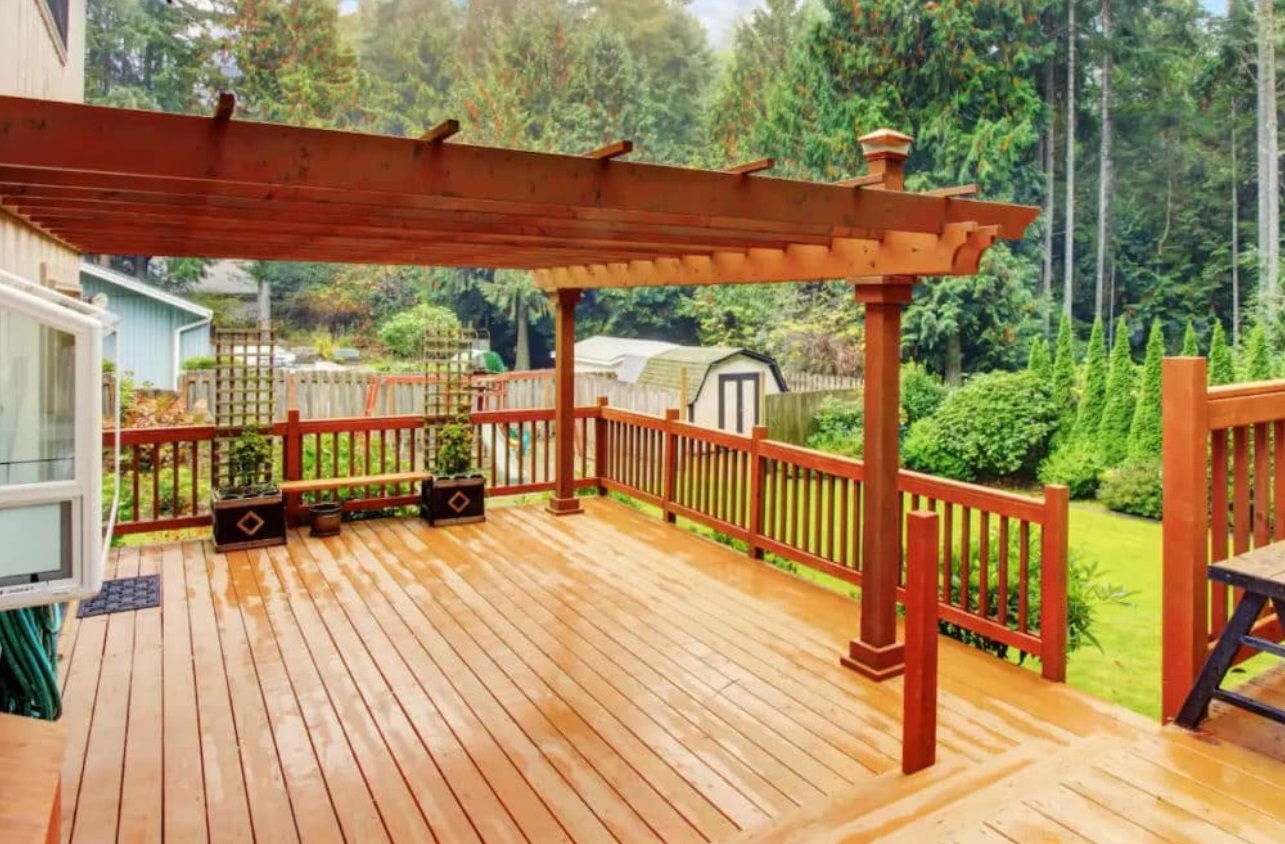
Where can I construct a wooden terrace?
In general, a terrace can be built in almost any location on your property – whether right next to the house or in an open area in the garden. When selecting the ideal location, several factors should be taken into account:
For instance, avoid placing your wooden terrace near trees, as they collect a lot of moisture, and their roots can harm the terrace’s substructure. The accumulation of moisture, leaves, and other natural debris can lead to wooden floorboards becoming slippery, potentially discolored, and an increased risk of mold. Even with the best substructure, once the wood starts to rot, it will be of no help.
When choosing a location, consider the underground cables in the garden, and plan for potential electrical connections for lighting and sockets on the terrace itself.
Sun protection and possibly a privacy screen also play a crucial role. Ample space for both elements should also be available on your new wooden terrace.
Ultimately, the substructure of your terrace requires a solid foundation. When choosing a location, also consider that a suitable substructure will need to be provided based on the surface.
Foundation for the substructure:
If the decking boards on your wooden terrace come into direct contact with the ground, they will absorb moisture from the ground and eventually rot. To prevent this and ensure a stable foundation for the terrace, a proper substructure is essential when building a terrace. However, the substructure, often made of high-quality wood, also needs a sturdy foundation:
As a result, establish a foundation made of concrete or reinforce the subsoil. Create support points using stone slabs or bases on the prepared surface. Alternatively, a point foundation with post supports can also be poured. Subsequently, attach square wooden beams to the support posts, support posts, or stone slabs.
The support points guarantee a small contact area between the wooden beams and the subsurface in all variations.
You can firmly connect the substructure to the ground or create a floating structure. In the latter case, you secure the beams together to form a frame on which the decking boards are then placed.
If the ground has been paved or a point foundation has been poured, the entire area should be covered with weed fleece before laying the foundation, foundation stones, or floor slabs.
Install all the joists so that they are 5 cm to 6 cm from the ground. Ensure that the terrace has a slope of at least 2%. If the terrace is adjacent to a building, the slope should be away from the masonry.
The spacing between the support joists depends on the thickness of the installed decking boards:
– for board thicknesses up to 2.5 cm = distance 40 cm
– for board thicknesses over 2.5 cm = distance 50 cm
If two support joists need to be joined, connect them with stainless steel flat connectors and ensure that both rest on the foundation stones.
Suitable materials for the substructure:
Wood is an ideal material for the substructure of a wooden terrace. However, aluminum support joists can also be used.
If wood is used, the same wood should be utilized for the support structure and the decking. This ensures that different wood types do not expand differently, causing damage to the wooden terrace. Not all wood types have all required materials available, such as for Bangkirai. In such cases, aluminum supports serve as a good alternative.
Although aluminum is slightly more expensive than wood, it is a worthwhile investment due to its resistance to warping and compatibility with all types of wood. Decking boards are simply screwed into the aluminum supports using self-tapping stainless steel screws.
For those using a WPC patio cover, it is recommended to select a WPC support for the substructure. This guarantees equal durability for both the substructure and the patio cover.
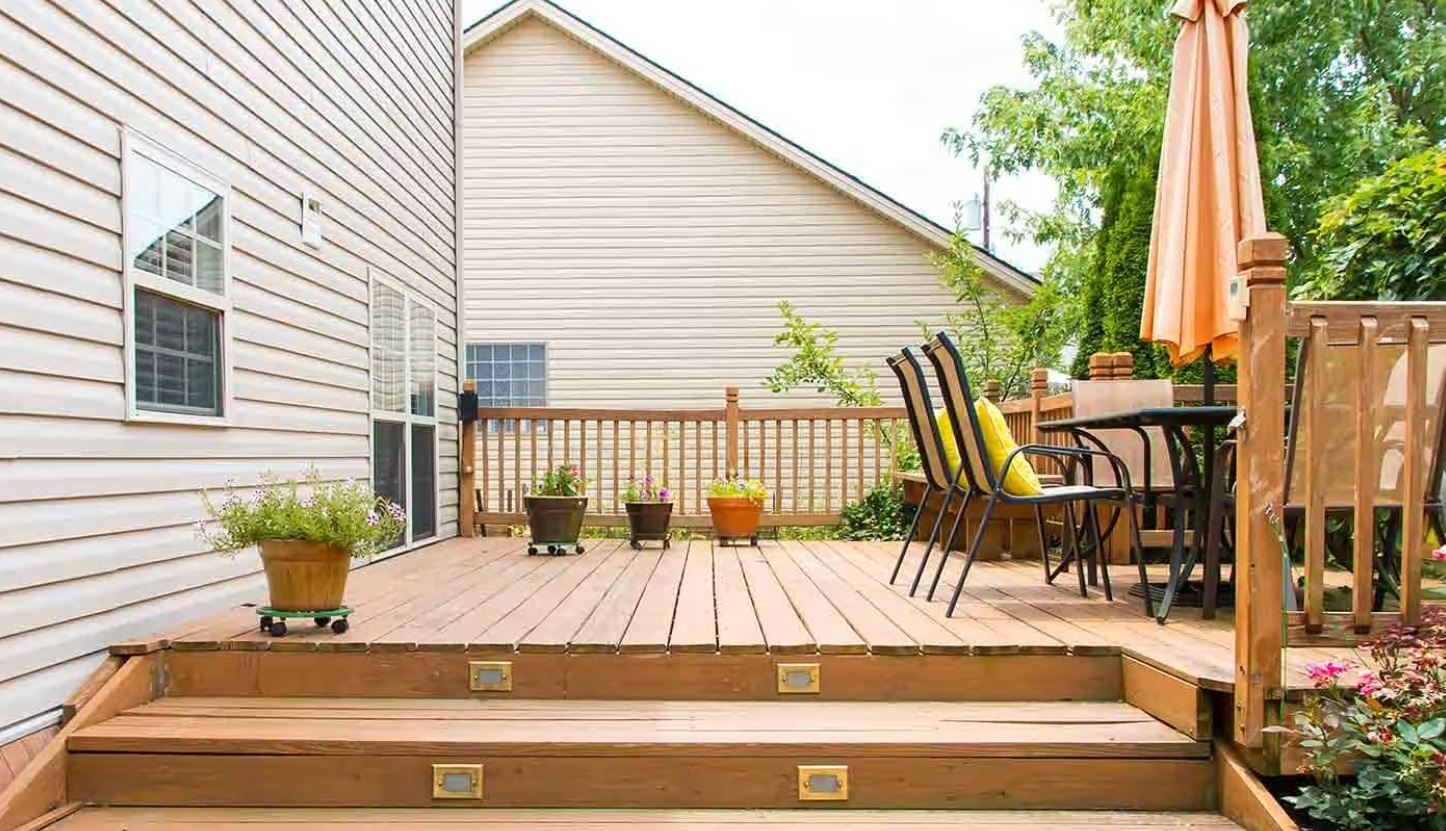
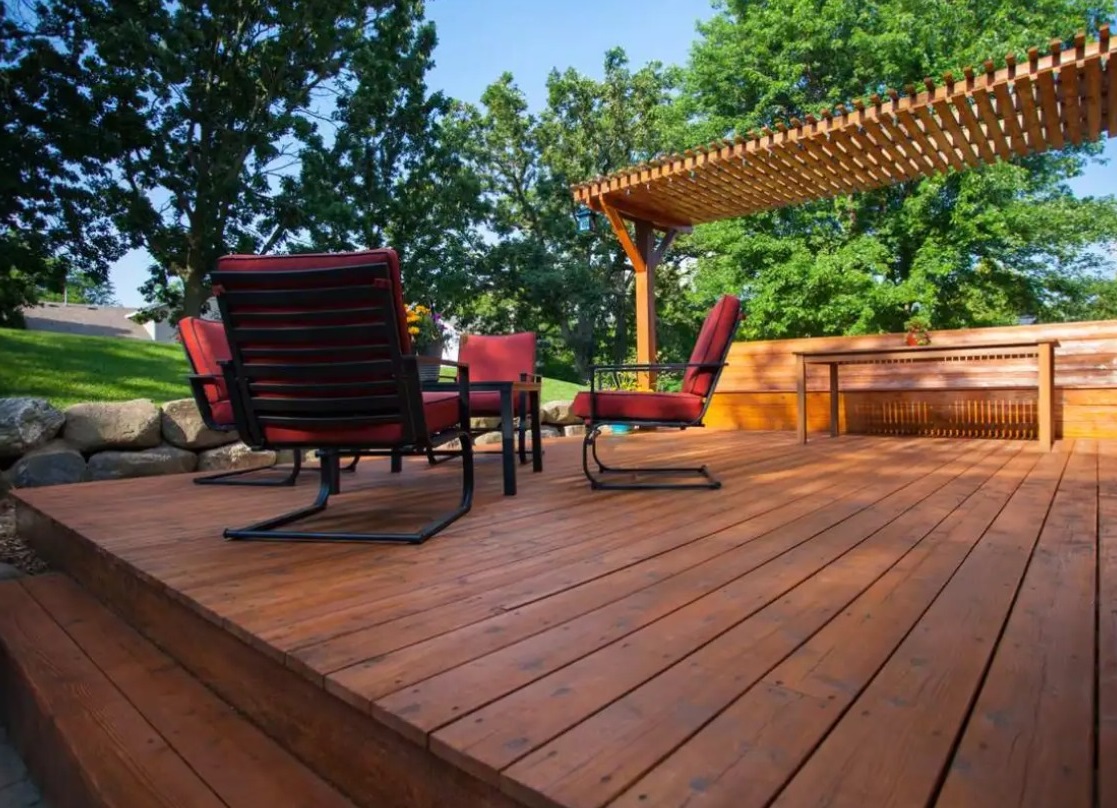
Constructing a wooden deck in the backyard
When considering constructing a wooden deck over a grassy area, it is important to take certain factors into account: The ground that will serve as the base for the deck needs to have proper drainage and be resistant to frost. By bordering the area with edging stones, you can prevent grass and weeds from growing under the wooden deck.
The ground must also have adequate load-bearing capacity, as a wooden deck can be quite heavy. If the ground is too soft for the deck, there is a risk of damage such as warped floorboards or dents in the wood. Therefore, if you plan to build a wooden deck over a grassy area, it is advisable to prepare it as if you were constructing a paved deck.
Clear the area and replace the soil with coarse sand or, preferably, gravel. The layer of gravel should be around 20 cm thick. This should be followed by 5 cm of sand, then weed barrier fabric, and the foundation slab along with the necessary base pad, if required. Use foundation stones, paving slabs, or other concrete stone slabs as the foundation. Place them directly on the sand to ensure a level surface. Also, pay attention to the required 2% slope.
Keep in mind during the planning stage that the height of the deck depends on each of these layers. The deeper the deck should be, the deeper the preparation you will need to make. Also, consider the height of the deck door. Ideally, the deck should align precisely with the door.
Constructing a wooden deck on a point foundation If your deck is approximately level with the ground, a small point foundation is ideal for the substructure. The advantage here is that you won’t need to clear a large area and stabilize it with gravel and chips.
If the soil is well-drained, you won’t need to make the foundation very deep: 40 cm is sufficient. However, if the soil is less suitable or you want to create a frost-resistant foundation, opt for a depth of at least 80 cm.
Dig the area to a depth of about 10-15 cm and fill it with coarse sand. Then proceed to dig the foundation hole. A soil auger, which can be rented from the equipment rental service at your local OBI store, can assist in drilling a hole approximately 50 cm deep with a diameter of about 20 cm in the ground.
Add around 10 cm of gravel into this hole, compact it, and then pour in the screed concrete. Compact it as well, lay the weed fabric over the area and foundation, and place concrete base stones on each foundation as a support for the substructure of your wooden deck. You can use square gutter stones (16 cm x 16 cm x 12 cm), for example. To adjust for any height differences, use plastic strips beneath the blocks. Alternatively, concrete can be shoveled underneath.
Maintenance and care of your wooden deck The substructure of your wooden deck plays a significant role in its longevity. By selecting the appropriate wood for the deck floorboards and consistently caring for and maintaining them, you can enjoy your wooden deck for years to come. Wood species such as Douglas fir, larch, thermowood or bangkirai are particularly well-suited for deck coverings. When using tropical woods, ensure that the wood is sourced from sustainable forests to promote sustainability. Look for the FSC certification to easily identify this. You can also find plenty of local wood from sustainable forests.
Douglas fir, larch or Bangkirai are naturally quite weather-resistant. Additionally, regular cleaning is important for maintenance. For instance, it’s necessary to regularly remove leaves and dirt. Weathering can also be prevented by applying a wood protective glaze or decking treatment oil.

FAQ – frequently asked questions about constructing a wooden terrace substructure
How can I construct a substructure for a wooden terrace?
To build a wooden terrace substructure, the first step is to prepare the subsurface, ensuring it is both level and stable. This can be achieved in several ways:
– Creating a base of compacted gravel
– Constructing a point foundation
– Pouring a complete concrete floor slab
– Placing stone slabs or pads on the prepared floor to create support points, which reduces the contact surface between the wood and the surface, ensuring ample ventilation and preventing wood rot. Subsequently, supports for the substructure made of wood, WPC, or aluminum are placed at these support points to which the boards are attached.
Further comprehensive step-by-step instructions with videos can be found on this page in the OBI guide to building a wooden terrace.
What kinds of wood are suitable for wooden terrace substructures?
Weather-resistant wood, such as larch or Douglas fir, is particularly suitable for wooden terrace substructures. Additionally, thermowood or pressure-impregnated wood is highly durable, while aluminum or WPC supports are even more long-lasting. Opting for the same wood for the substructure and decking is advisable, as it prevents tensions and damage by ensuring that construction parts made of the same wood work in the same way, given that each type of wood is subject to different weathering, working, and expansion.
Which wooden slats should be used for the substructure?
For a wooden terrace, wood with a thickness of approximately 4.5 cm by 7 cm has proven successful for the substructure. The specific thickness required depends, among other factors, on the number and distance of the support points and the spacing between the pieces of wood.
Terrace substructure – how deep should it be?
The wooden terrace surface should be flat and stable, which can be achieved by compacting the subsoil. To accomplish this, the terrace area should be cleared, and a layer of gravel, compacted thoroughly, should be installed. The compacted gravel layer should be approximately 20 cm thick. The exact depth of the substructure depends on factors such as the desired final height of your terrace and the height of the substructure.
What is the appropriate spacing for the substructure on a wooden terrace?
On a wooden terrace, the spacing between the supporting wood on the substructure should be around 40 cm to 60 cm. It is important to note that the denser the wooden slats, the sturdier the terrace will be, ensuring that the planks do not bend even under heavier loads. With increasing board thickness, the spacing between supporting timbers in the substructure can be widened while maintaining the same stability.