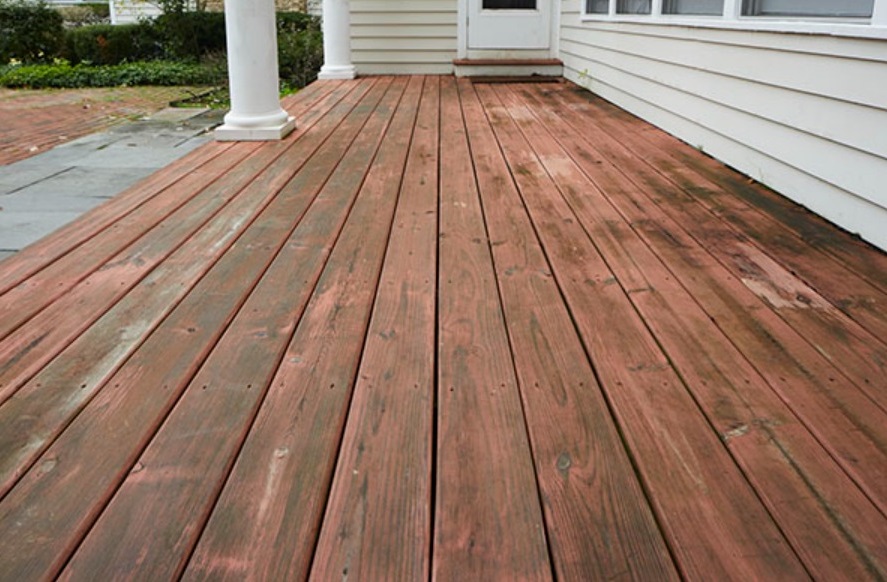
Compared to stone or concrete, wood is more susceptible to weathering. Rain, wind, sun, snow, and ice can cause wooden decks to turn gray and sustain long-term damage. It is crucial to regularly clean and care for the boards to ensure the longevity of your wooden deck.
Properly cleaning a wooden deck
Weather and everyday use can leave marks on wooden decks, such as a grayish patina and small cracks. Moisture can seep into these cracks, leading to fungal damage. Regular cleaning and subsequent care can prevent this. Terrace oil can be used to protect the surface from cracks and moisture, maintaining the wood’s resilience. A fresh coat of paint can restore the wood’s brown color, eliminating the patina.
Removing coarse and grayish dirt
We recommend thoroughly cleaning and caring for your wooden deck twice a year: in spring, after winter, before summer and in preparation for winter in autumn. Ensure the surface is completely dry before cleaning. First, use a broom to sweep away any coarse dirt from the deck.
Note: Depending on the type of wood, pay attention to the broom’s bristles. For soft coniferous woods like larch or Douglas fir, use the softest bristles possible to avoid damaging the floorboards.
Next, use a garden hose to thoroughly wet the wood. If necessary, apply a wood cleaner evenly to the floorboards using a surface brush. After the recommended exposure time, further cleaning with a brush or broom can be done.
Note: For varnished wood, use a disc sander before treatment, or remove old paint with a suitable paint stripper.
Removing green growth
A green covering on a wooden deck increases the risk of accidents in wet conditions. When moisture settles on moss or lichen, the deck becomes slippery. This risk can be eliminated with an environmentally-friendly deposit remover. Alternatively, there are home remedies and mechanical solutions that are usually more environmentally friendly for removing moss and lichen.
Cleaning the floorboards with home remedies
Using water and detergent
Add a small amount of dish soap to a bucket of hot water and stir until the liquid foams. Then spread the water and dish soap mixture over the floorboards. Thoroughly clean the wet wood with a stiff-bristled broom or scrubber, and rinse the area with clean water.
Using mild soap
Apply undiluted mild soap to the deck and scrub with a brush to remove dirt and green deposits. After cleaning, rinse the deck thoroughly with a garden hose or watering can.
Using baking soda
Baking soda is a practical and cost-effective household cleaner for wooden decks. Mix the powder with water, apply the mixture to the decking using a brush, let it work for three hours, then scrub the floorboards thoroughly with clean water.
Note: Do not use acidic materials like vinegar, as they can damage the wood long-term.
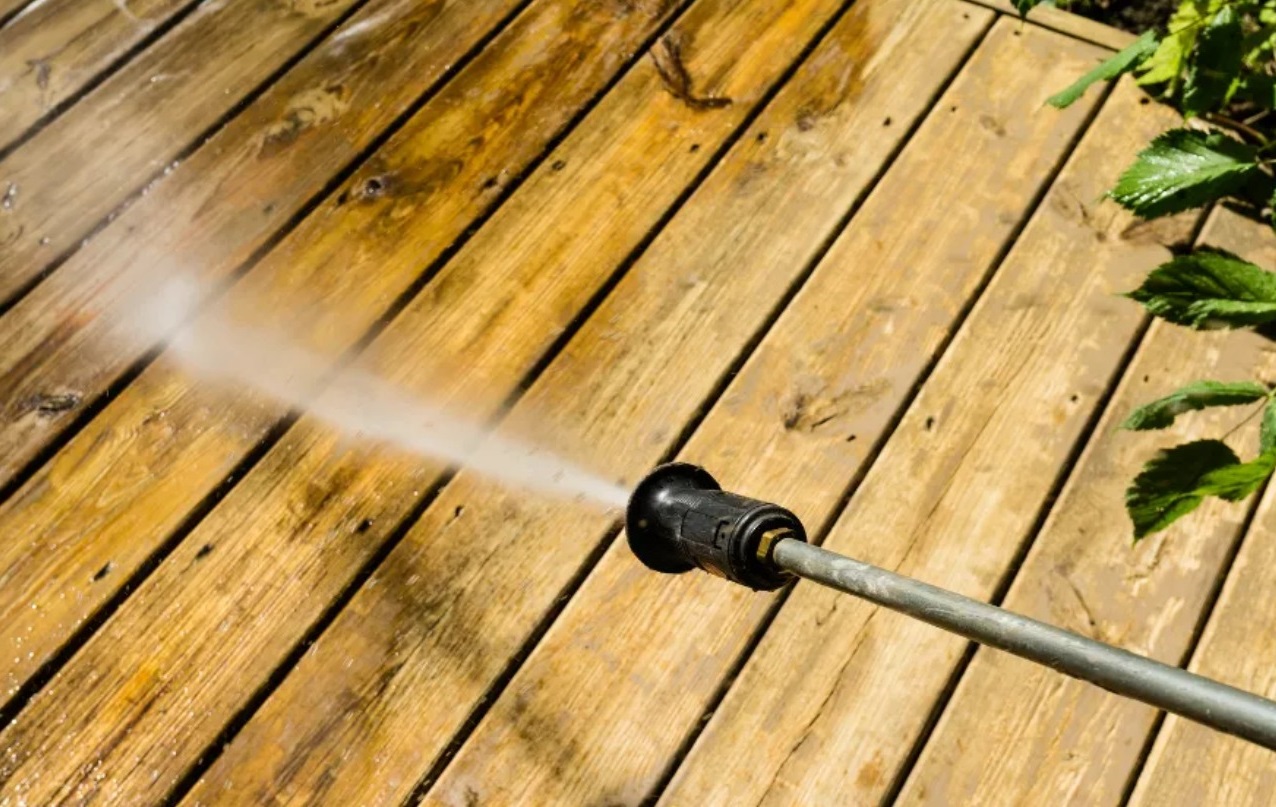
Cleaning the wooden deck with a high-pressure cleaner
The use of a high-pressure cleaner is not suitable for all wood types. Soft coniferous woods like larch or Douglas fir may be damaged by the water pressure, so it’s advisable to avoid this procedure. However, hardwoods like bamboo, Bangkirai, or Kempas can be cleaned more easily with a high-pressure cleaner.
Note: Avoid using a spot jet nozzle or dirt sprayer with high water pressure, as they can damage the wood.
Basic cleaning
For hardwood floorboards, use a flat jet nozzle for basic cleaning. This can clean a large area of the deck in a short time. Be sure to reduce the water pressure, as excessive pressure without special attachments can damage the wood. Maintain a distance of about 30 cm between the nozzle and the wooden floorboards, and work in the direction of the grain to prevent the fibers from standing up, which can roughen and crack the surface.
After basic cleaning, use a surface cleaner or scrubber.
Thorough cleaning
Surface cleaners are especially suitable for large areas such as patio floors. The cover on the machine also acts as a protective barrier. However, when cleaning wooden surfaces, it’s best to utilize only surface cleaners with adjustable working pressure.
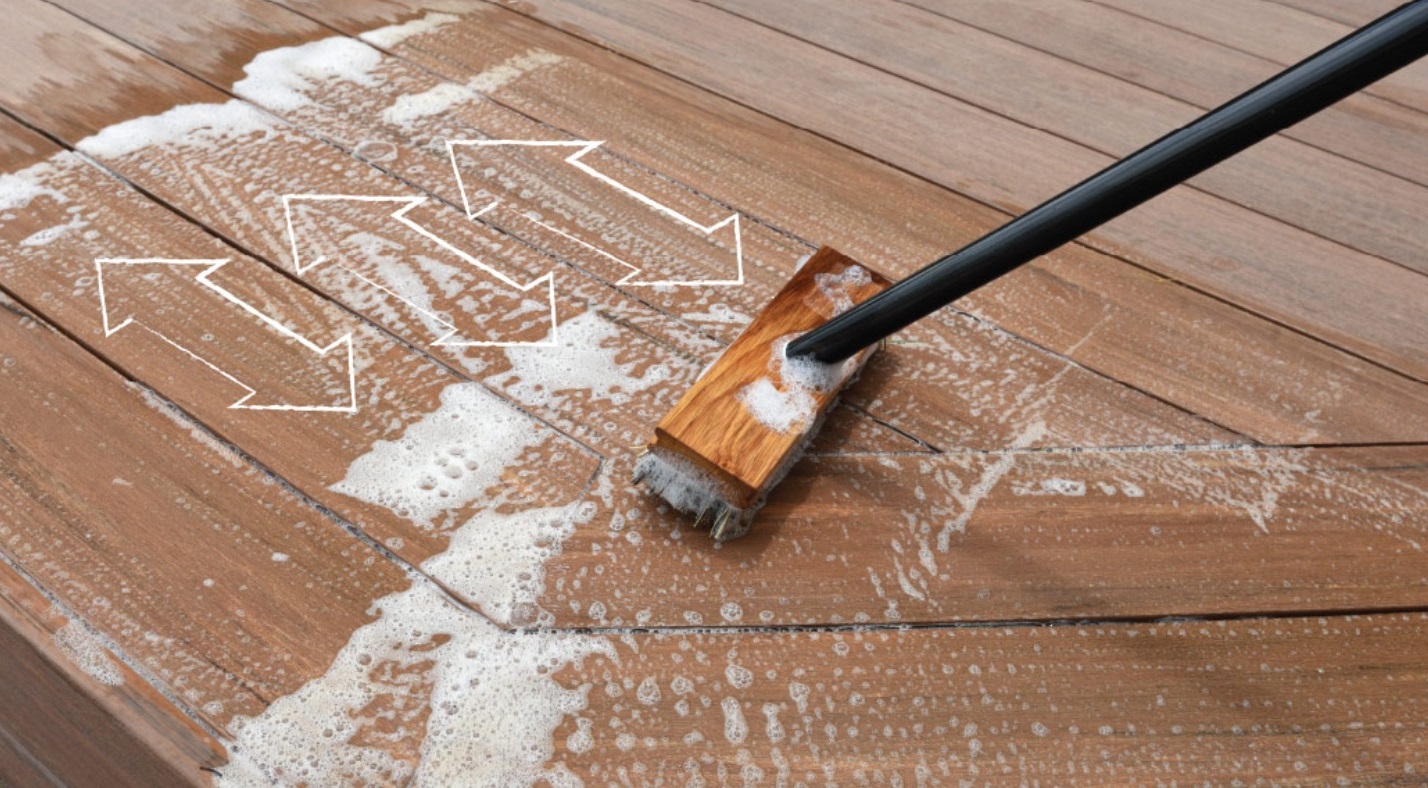
As an option to surface cleaners, you can employ a scrubber in addition to a high-pressure cleaner. It merges high-pressure cleaning with the mechanical impact of the bristles. This makes it easy to eradicate even stubborn filth. The brush incorporates multiple high-pressure nozzles that ensure enhanced cleaning performance. The scrubber is perfect for cleansing wooden decks because it allows you to work with the natural grain or direction of the grain. Stubborn dirt can be effectively removed with the assistance of a wood cleaner.
Tip: Experiment with the diverse nozzles and attachments of the high-pressure cleaner initially on an inconspicuous area of your patio. This way, you can test the ideal water pressure and cleaning distance.
It is essential to clean the entire surface to ensure a consistent color. The patio should then be left to dry for at least 24 hours. This prevents moisture from lingering in the wood, which can lead to the floorboards rotting beneath the subsequent oil-treated layer.
Tip: You can also utilize the high-pressure cleaner to restore most wooden garden furniture to a high gloss. We will explain how to do this in our related guide.
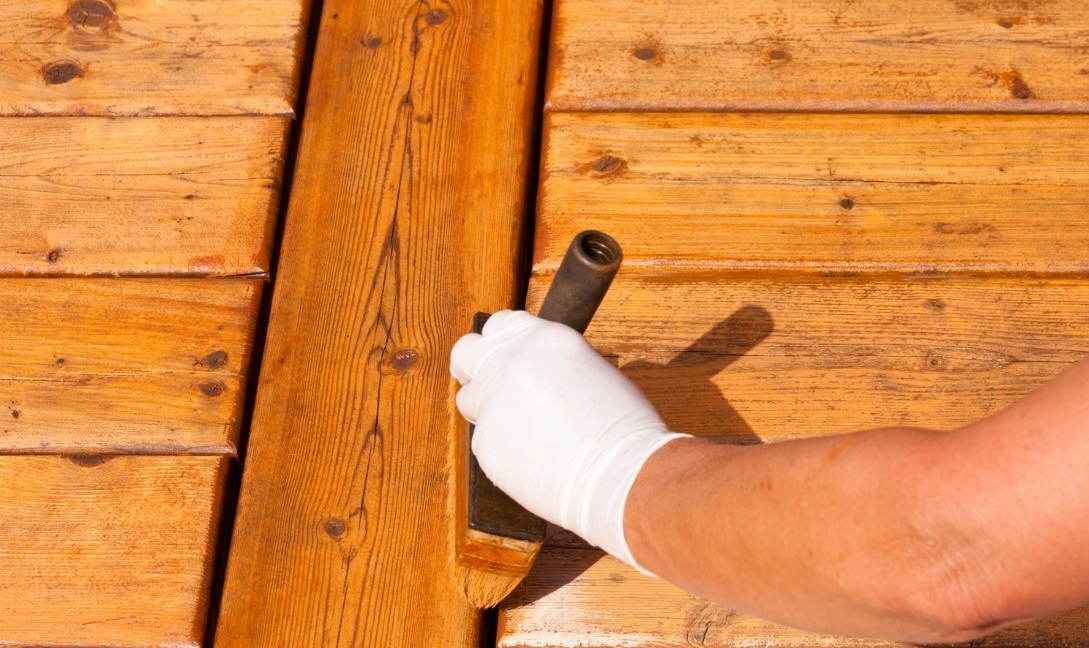
Oiling the deck
In addition to regular cleaning, wooden patios also require maintenance. Treating the floorboards with appropriate oil is advisable to prevent surface cracks and simultaneously avoid the formation of a gray patina.
Transparent oil is recommended if you do not want to alter the color of the material. Colored products, such as naturally colored Douglas fir oil, will bring out the original wood color more distinctly.
This product smoothens the surface of the boards and envelops them in a protective layer that repels water and dirt. However, wood-protecting glazes and varnishes are not suitable for deck maintenance, as they wear off quickly due to frequent use.
When oiling the floorboards, the conditions should be as calm and dry as possible. Such weather conditions ensure that the product can penetrate deep into the wood. This is because the surface dries out too quickly when exposed to the hot sun.
When oiling, you should cover about three to four boards in a row and apply the care oil with a brush or short-haired roller. Once absorbed, repeat the process, treating the entire layer step by step. The wood care oil should be allowed to be applied for at least 24 hours before the terrace is used again.
Tip: Natural oil-based care products are not harmful to health, which is why they are also used indoors and in the production of children’s toys.
Regularly removing dirt
Until the next thorough cleaning, simply sweep the floorboards thoroughly at regular intervals. It is especially crucial to fully remove leaves, bird droppings, and other pollutants, as they can cause discoloration of the wood. If stubborn stains have already appeared, you can typically remove them with a brush and a little soap or use a special patio cleaner. If weathered areas appear on wooden floorboards throughout the year, it is wise to re-oil the affected floorboards separately. This saves effort and time during the next thorough cleaning.
Which wood is suitable for a patio?
The amount of maintenance needed also depends on the wood selected for your patio. Boards made from tropical woods such as teak or bangkirai are highly sought after. These relatively costly wood types are resistant to insect infestation and decay. Their dark color also presents an elegant appearance.
Teak and bangkirai will turn gray over time if left untreated, but their hardness will not diminish. If you don’t mind the discoloration, the maintenance effort will be minimal. If you choose these woods, be sure to purchase certified goods from sustainable forests, which can be identified, for example, with the FSC stamp.
Decking made of local wood is often more economical and environmentally friendly. Pressure-treated spruce or pine are good options. Douglas fir or larch are also relatively resistant to weather influences. However, if left untreated, local wood will not match the durability of tropical wood. Nonetheless, its durability can be enhanced by employing specific processes.
For this purpose, the wood is either soaked in wax (permanent wood) or treated with organic alcohol using a special method (Kebony). Once dry, the alcohol hardens into a polymer, making the wood durable. The third option to enhance durability is heat treatment (thermal wood).
FAQ – Frequently asked questions about cleaning wooden decks
Can I clean my wooden deck with a pressure washer?
The suitability of cleaning your deck with a high-pressure cleaner depends on the type of wood in the floorboards. For very soft wood types, it’s preferable to avoid using a high-pressure cleaner; for hard wood types, it can be used.
But make sure the water pressure is not too strong. Also, only use a flat jet nozzle, polisher, or surface cleaner, and do not use a spot jet nozzle or dirt sprayer.
How frequently should I maintain my wooden deck?
We suggest cleaning your deck twice a year – once in the spring and once in the fall.
How can I clean my wooden deck?
Start by sweeping away coarse dirt and leaves with a broom. Get rid of green deposits with an appropriate cleaner and scrubber. You can also employ household products like mild soap, dishwashing liquid, or baking soda for cleaning. Apply a gray remover to the entire area to eliminate the gray layer from the floorboards.
For more stubborn dirt, you can also utilize a high-pressure cleaner. Use an attachment such as a flat jet nozzle, scrubber, or surface cleaner.
Remember to apply a wood protectant to the floorboards after cleaning. After the wood has dried for at least 24 hours, apply a suitable wood oil.
Which cleaner is most suitable for a wooden deck?
You have several cleaning options for cleaning your wooden deck boards:
Home remedies (dishwashing liquid, mild soap, baking soda)
Green deposit remover
Degreaser
Specialized patio cleaner
The most appropriate cleaner for your wooden deck depends on the amount of dirt and the type of wood on your deck.
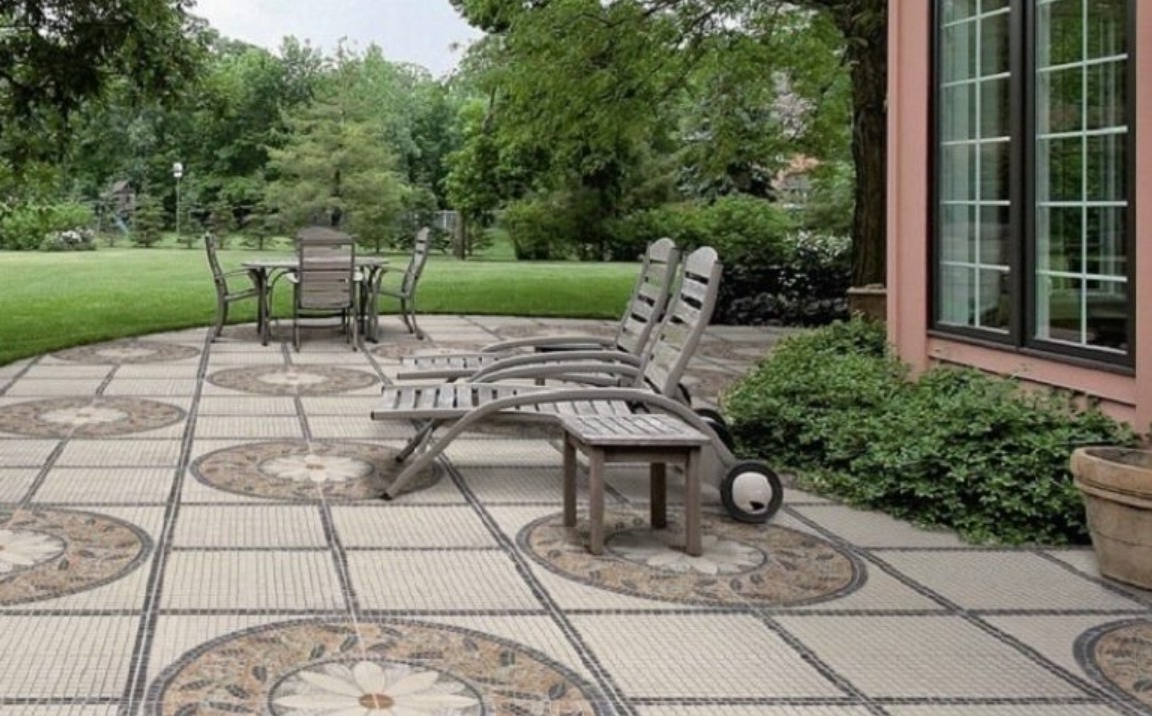
Cleaning patio tiles
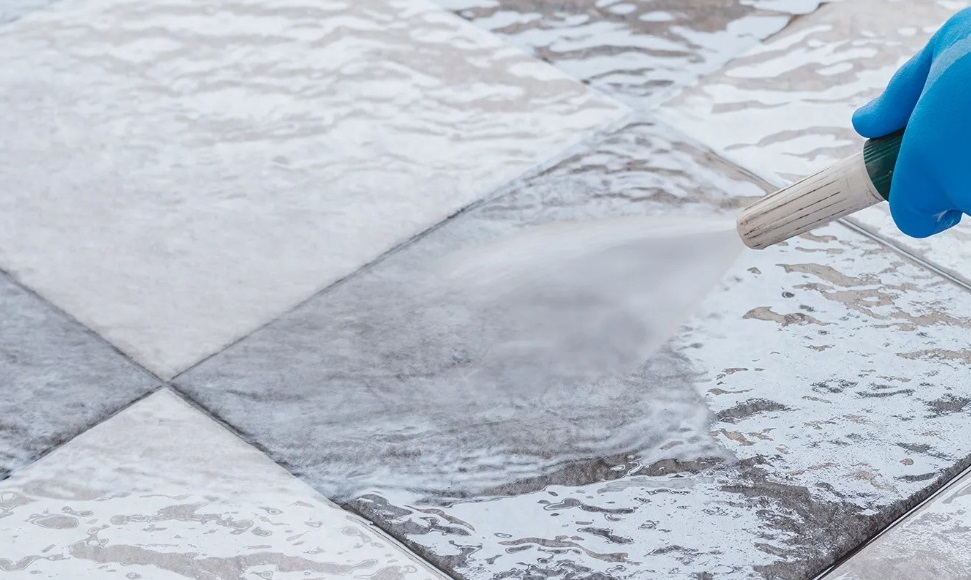
Whether they’re made of natural stone, concrete, or porcelain stoneware, green deposits and moss tend to build up on patio slabs over time. We will explain how to clean patio tiles effectively to remove dirt from your patio.
How do you clean patio tiles properly?
Compared to wooden floorboards, the maintenance of patio tiles is not as demanding. There are mechanical and chemical aids available for cleaning. To avoid damaging the patio tiles, it’s important to match the cleaning agent to the specific material and, if necessary, test it first in an inconspicuous area.
To clean your patio, start by removing coarse dirt from the joints using a special brush or joint scraper. Consider the bristle hardness to prevent scratching the patio tiles. Use a scrubber, water, and mild soap or a high-pressure cleaner with a specialized attachment to clean the slabs themselves.
Note: Only use chemical cleaners outdoors if they have been explicitly approved for their intended purposes. Weed killers and seemingly harmless home remedies like salt or vinegar are not permitted on sealed surfaces as they can seep directly into the groundwater.
Why is it important to clean patio tiles?
After a wet winter or extended period of rain with mild temperatures, algae and moss can accumulate on and between patio tiles. Especially on rough materials like natural stone, this algae finds suitable surfaces and spreads rapidly.
The green film on patio slabs not only affects the appearance of the patio but can also pose a safety hazard. When wet, it creates a slippery layer, making it unsafe to walk on the terrace.
Over time, material damage to the slabs can also occur, as moss and algae growth can cause small cracks to form. Exposure to weather conditions can exacerbate these cracks, subjecting the material to additional stress and potential further damage. Therefore, it’s important to regularly clean your patio tiles.
Preparation: Clean the joints and remove debris Before actually starting to clean the slabs, prepare the patio by cleaning the joints and getting rid of any coarse dirt.
Use a special joint brush or joint scraper to thoroughly clean the spaces between the patio tiles and remove weeds and moss. Then, sweep the patio thoroughly with a broom to remove loose plant debris and other coarse debris.
For larger patios, an electric weed remover or weed burner can make the task easier. However, for safety reasons, only use an open flame in mild weather.
Note: When using a weed burner, remember that significant temperature variations can lead to cracking or splitting of the slabs. Avoid working with the torch in a particular area for an extended time period. Also, pay attention to the vegetation in the garden adjacent to the terrace, as dry plants may be at risk of burning in prolonged periods of heat.
Cleaning terrace tiles – the process
Once the terrace has been cleared of coarse dirt and weeds, the next step is to clean the terrace tiles. However, not all tiles are the same – there are different cleaning methods available depending on the material. Below, we will explain the best way to clean terrace tiles made of natural stone, concrete, and porcelain stoneware.
How to clean natural stone terrace tiles?
Natural stone terrace tiles have natural irregularities such as cracks and grooves on their surface. This makes them a good breeding ground for natural occurrences like sandstone, algae, and moss. This results in the formation of green deposits, which can typically be removed with water and a pH-neutral soap.
Reminder: Electric brushes and similar mechanical cleaning tools can cause scratches on stone countertops.
For hard natural stones like granite, you can utilize a high-pressure cleaner with a surface brush to eliminate dirt. However, when dealing with softer natural stones such as marble or limestone, high-pressure cleaners are only partially suitable, as the high pressure of the spot jet can cause indentations in the patio tiles. It is recommended to use a wide jet and maintain a distance of at least 30 cm from the stone slabs.
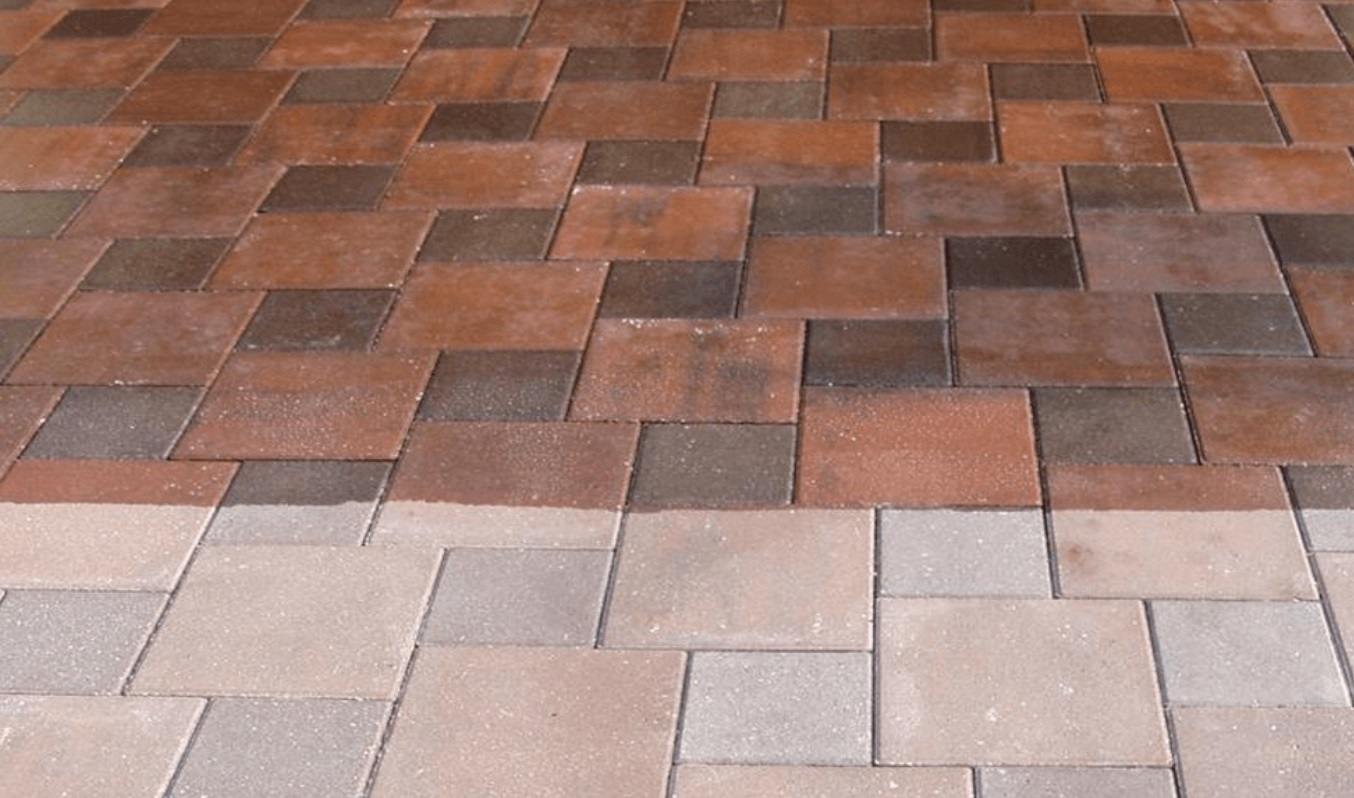
How to clean concrete patio slabs? While concrete is durable, moss and weeds may accumulate, particularly at the joints between the concrete slabs. Additionally, weather conditions may lead to small surface cracks. To prevent discoloration, it’s advisable to regularly sweep the patio to ensure no debris is left behind.
You can easily remove coarse dirt from concrete slabs by using sand as a form of natural abrasion. By sweeping fine sand over the patio slabs, even dry dirt can be effectively removed.
To address green algae on patio tiles, warm water and a scrubber can be used for cleaning. Alternatively, a paving stone cleaner can be employed. If opting for a high-pressure cleaner, it’s important to use moderate pressure and maintain a safe distance from the panels.
How to clean porcelain stoneware patio tiles? Porcelain stoneware, known for its stable and hard structure, is both resilient and easy to clean due to its smooth surface, making it less susceptible to algae and moss. Since this type of slab is typically laid solidly with grout, there’s minimal chance for moss or weeds to grow between the slabs.
Various cleaning methods include:
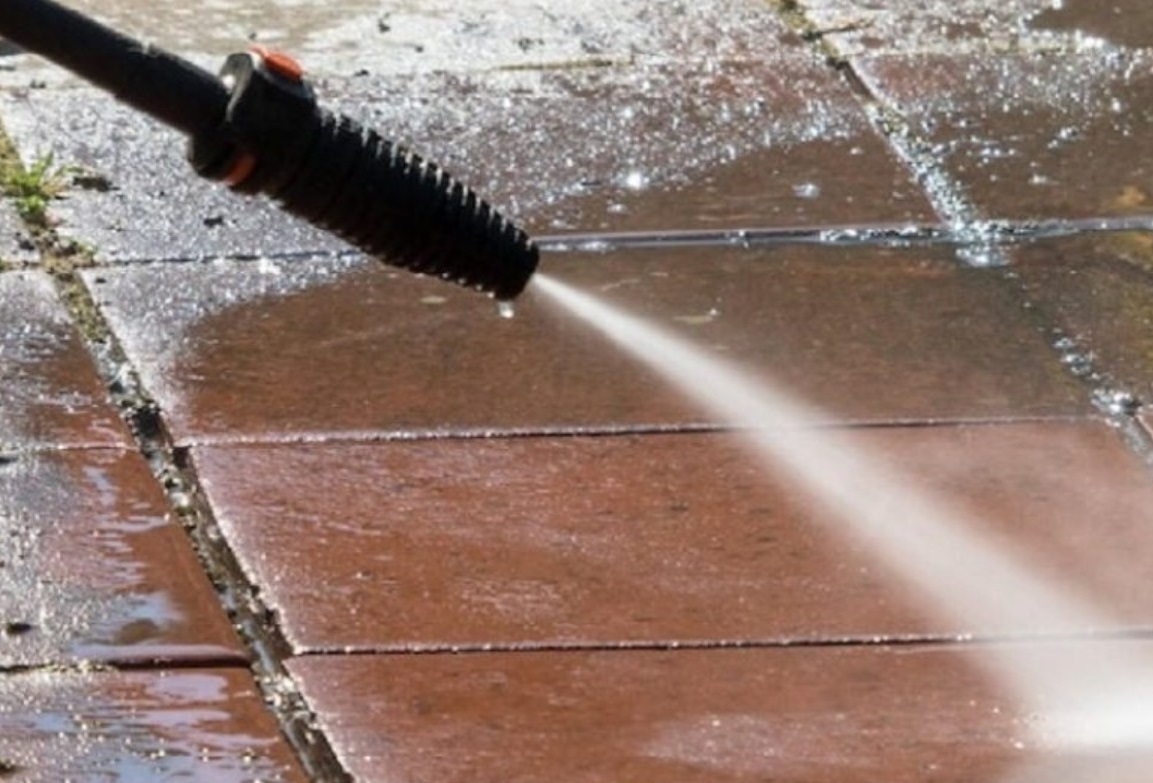
– Using a scrubber and mild soap: Effective cleaning can be achieved with water, mild biodegradable soap, and a scrubber. This method is cost-effective and can be used throughout the garden without concern for plants. The terrace should be thoroughly rinsed with clear water after the stone or concrete slabs are cleaned.
– Using a pressure washer: After removing coarse dirt, moss, and weeds, a high-pressure cleaner can be used with a suitable cleaning tool to protect the terrace tiles. Alternatively, without an attachment, it’s important to maintain a distance of at least 30 cm between the spray nozzle and the terrace and be cautious around the joints to prevent damage.
– Use of chemicals: Chemical cleaners like green deposit removers can be effective but should only be used if approved for cleaning natural stone, concrete, or fine stoneware terraces. It’s advisable to attempt mechanical cleaning methods first as water and soap are typically sufficient for thorough dirt removal and have less impact on the environment.
It’s best to avoid using chemicals if possible to prevent harmful substances from entering the groundwater unfiltered. This is especially important due to the potential for high fines for violations related to certain products used in covered outdoor areas under the Plant Protection Act. Keeping your patio tiles clean in the long term is essential.
After removing dirt and grime from your patio and restoring its shine, you’ll want to take steps to prevent future contamination. Here are three essential tips for maintaining your patio:
Tip 1:
Following the cleaning process, it’s a good idea to sweep the new jointing material into the wet joints. This step is especially important when using a high-pressure cleaner, as it helps to prevent weed growth by keeping the joints well-filled.
Tip 2:
Regularly sweep the patio with a broom to ensure that fallen leaves and other organic debris don’t accumulate on the stone slabs for an extended period, as this can lead to unsightly discoloration.
Tip 3:
Once the patio is thoroughly cleaned, consider applying a sealant to the patio tiles. This protective seal will safeguard the material from water and weather damage and deter the formation of algae.
FAQ – Questions and answers on cleaning patio tiles
What’s the best way to clean patio tiles?
In most cases, using soap and water to scrub patio tiles suffices. For more stubborn dirt, a high-pressure cleaner or specialized cleaning agents can also be effective. Always ensure that the cleaning products and tools you use are suitable for the material of your terrace tiles. For example, avoid cleaning soft materials like limestone with abrasive tools or excessive pressure, as this can cause damage.
How can I eliminate stains from terrace tiles?
Algae or plant residue stains can typically be removed with a scrubber and soapy water. For oil or food stains, special cleaning products may be necessary, depending on the type of slab.
When should you clean your terrace?
It’s generally recommended to clean your terrace twice a year, ideally in the autumn and spring to prepare for summer use. However, if the terrace isn’t cleaned regularly, it should be cleaned once moss, algae, and weeds begin to form a slippery layer in wet conditions. This should also be done if a green coating starts to harm the terrace slab material.
Can you use baking soda to clean paving stones?
Yes, you can clean paving stones and patio slabs with baking soda. Create a solution of baking soda and warm water, apply it to the stone slabs, and scrub away the dirt with a scrubber. Let it sit for a few hours, then rinse off the solution and dissolved dirt with water. Note that soft natural stones like terracotta should not be cleaned with baking soda, but hard stone slabs can be safely cleaned with household remedies.
Can you clean concrete slabs with vinegar?
Cleaning concrete slabs using vinegar is possible but falls into a legal gray area due to its potential for weed control, which is prohibited. Additionally, using vinegar for cleaning on sealed surfaces increases the risk of it entering the groundwater.
Sealing patio tiles
To protect your patio from contamination and simplify its maintenance, consider sealing the patio tiles. Whether they are made of concrete, natural stone, or paving stones, it’s important to follow the proper steps for sealing stone slabs and to be mindful of certain considerations.
Why seal terrace tiles?
Your terrace tiles are exposed to various weather conditions throughout the year, leading to natural wear and tear, such as a grey haze or increased growth of green deposits like algae and moss. By applying a sealant, you provide a protective layer against weathering, dirt, and stains, reducing maintenance and making cleaning easier. Sealing also enhances the tiles’ frost resistance and visual appeal.
The frequency of resealing your terrace covering depends on the weather and usage, and you should refer to the manufacturer’s instructions for guidance on when to renew the seal.
Should I seal or impregnate my terrace tiles?
Impregnation is an option for protecting terrace tiles that is similar to sealing. It shields the tiles from dirt and liquids, making them easier to maintain and clean. So, what sets these two protective treatments apart?
The main difference between sealing and impregnation lies in the diffusivity (water vapor permeability) of the treated terrace tiles.
When you seal the tiles, it completely closes the capillaries (small cavities/tubes in the stone) on the surface, preventing water vapor from escaping. Sealants form a film and are best suited for surfaces that won’t be exposed to increased humidity.
In contrast, impregnation penetrates the stone and covers the capillary necks on the surface with a transparent film. This process doesn’t fully close the capillaries but only narrows them. The stone loses its absorbency, yet still allows water vapor to escape after being impregnated.
The choice between sealing or impregnating your terrace tiles depends on the material. For instance, impregnation is particularly recommended for concrete and natural stone with large pores.
Tip: Regardless of whether you choose to seal or impregnate, always follow the individual processing instructions on the packaging. It’s also important to test your protective agent on an inconspicuous area of the terrace or on a replacement slab to prevent unwanted discoloration and staining of the entire terrace area.
Sealing terrace tiles – step by step
1. Prepare the area
Step:
Cover terrace furniture
Gather materials and tools
Move terrace furniture aside
Cover/tape fixed terrace components (e.g. railings)
How to do it
Before beginning to seal your terrace tiles, make sure you have all the necessary tools and materials as listed in the instructions.
Ideally, choose a dry period with overcast skies and no direct sunlight when sealing your terrace tiles. Also, ensure that there is no frost on the ground at night. This will help the stone coating to have the desired effect on your terrace covering.
To protect your patio furniture during the process, remove all objects, especially those made of glass, ceramics, and plastic, from the patio. If removing them isn’t possible, be sure to cover or tape them. Additionally, protect fixed structures such as iron fence posts, privacy fences, and patio roofs.
2. Clean the patio tiles
Step:
– Clean the joints
– Remove coarse dirt
– Thoroughly clean the patio tiles with a scrubber
– Allow the tiles to dry
How to do it
Prior to sealing the patio tiles, give the patio a thorough cleaning.
Start by removing coarse dirt from your patio. Get rid of any moss and weeds from the joints with a joint scraper, if available, and then sweep the tiles clean with a broom.
Next, use a scrubber, water, and a basic stone cleaner to thoroughly clean the patio tiles and remove fine dirt and any green deposits. For stubborn dirt, you can also utilize special cleaning products like cement film remover, algae remover, and products for removing green deposits. When using these special cleaners, be sure to follow the manufacturer’s instructions.
Avoid using high-pressure cleaners, if possible. High-pressure cleaning can make the terrace surface rough due to excessive water pressure and increase the surface attack of soil particles. If you must use a high-pressure cleaner, use a rotating brush to reduce the water pressure.
After the basic cleaning, allow the terrace tiles to dry for up to 24 hours. Otherwise, the sealant won’t be able to absorb properly, potentially resulting in stains and a whitish haze.
3. Sealing patio tiles
Step:
A person applying sealant to patio tiles
A brief overview
Apply the sealant evenly
Remove any excess sealant
Avoid walking on the sealed area
How to do it
Once the patio tiles are completely dry, apply the stone sealer. Depending on the manufacturer’s instructions, use a pressure sprayer, a surface brush, or a roller to apply the sealant. For smooth surfaces, use a mop with a microfiber backing.
Work in sections, ensuring that you don’t walk on the newly sealed area. Make sure to create an even, gap-free film on each tile. Immediately wipe off any excess sealant with a dry cloth to prevent stains and a gray haze.
Note: When selecting a sealer, ensure that it’s compatible with the type of stone on your patio slab!
4. Allow the patio to dry and shield it from moisture
Step:
Dry the patio tiles
A quick look
Allow the patio tiles to dry for a minimum of 24 hours
Shield the surface from moisture
Don’t step onto the patio or put anything on it
Here’s the process
Let the sealed patio tiles dry for 24 – 48 hours. It’s important not to enter the patio during this time and to shield the area from moisture. To do this, lay a tarpaulin over a wooden frame. Make sure the tarpaulin doesn’t touch the patio tiles and there’s enough ventilation underneath. Secure the edges of the tarpaulin with weights to prevent it from blowing away. Also, be careful not to overload the treated area and avoid using dirty flower pots as a base for the tarpaulin.
Clean your tools immediately with water after use. This ensures the tiles are ready for the next cleaning and sealing of the patio tiles.
Tip: Impregnating the patio is similar to sealing. Therefore, you can follow the same four steps described here when impregnating your patio tiles.
When should you avoid sealing patio tiles?
You may choose not to seal or impregnate your patio tiles if you prefer the natural look. Many patio tiles, such as those made of concrete, already have surface protection from the manufacturer, eliminating the need for re-sealing or impregnating. Additionally, some special materials, like glazed patio tiles, do not require additional sealing.
Sealing also reduces the water vapor permeability of the patio tiles, which can result in efflorescence and discoloration of the surface. If you prefer to avoid these risks for easier cleaning, you may opt out of sealing. However, the benefits of sealing typically outweigh the drawbacks.

FAQ – FAQs about “Sealing patio tiles”
Can you seal patio tiles?
Yes, in general, all porous patio tiles, including concrete or natural stone, can be sealed. However, polished, glazed, and factory-treated patio tiles as well as non-absorbent stone types should not be sealed.
How to impregnate patio tiles?
Impregnating patio tiles is done the same way as sealing. First, thoroughly clean the patio. After the tiles have dried following the initial cleaning, apply the impregnation evenly – various tools such as a pressurized spray bottle or a roller are suitable for this. The impregnation needs to dry completely before the patio can be used again.
What is the purpose of stone impregnation?
Stone impregnation ensures that stone tiles are resistant to water and dirt, making it easier to clean and protecting them from weather and dirt.
How long should stone impregnation dry?
Stone impregnation or sealing should dry for at least 24 hours, preferably up to 48 hours. Only when the impregnation/sealing has completely cured do the patio tiles receive the desired protection. Stepping on the impregnated surface too soon could remove the impregnation.
Should you waterproof concrete tiles?
As a recommendation, concrete tiles should be impregnated. Impregnation not only protects the tiles from weather and dirt but also simplifies maintenance and cleaning. However, many concrete tiles have been pre-treated by the manufacturer and may already have a protective layer. When purchasing, find out if re-impregnation is necessary or if the tiles are already impregnated.
How to seal porcelain stoneware?
Whether and how porcelain stoneware is sealed depends entirely on the type of porcelain stoneware tile. If the tiles are already glazed, no additional sealing is needed. However, for polished but unglazed porcelain stoneware, sealing can be useful for preventing dirt. For unglazed tiles, simply clean the material thoroughly before sealing. For polished porcelain stoneware, the tiles need to be additionally impregnated after cleaning before the actual sealing is applied.
What goes between the patio tiles?
The material used between the patio tiles depends on the type of joint. If the stone tiles have loose joints, loose joint material such as sand is used. Conversely, if the tiles are firmly joined, the space between them is filled with a hardening joint material, such as grout.