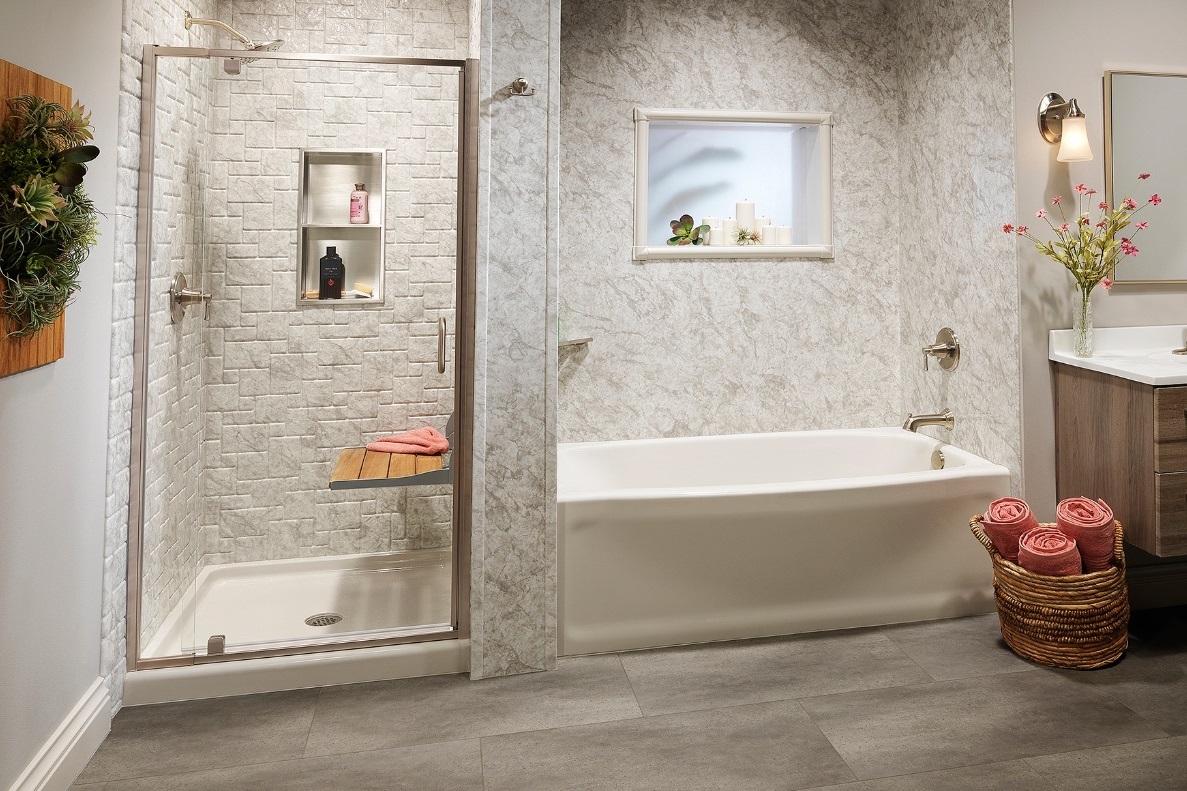
Tired of dealing with old and leaky shower walls? If yes, it’s time to think about upgrading to shower wall panels. The installation of shower wall panels can completely change the look and functionality of your bathroom, giving it a modern and sleek appearance while also offering additional durability and convenience. Although the installation process may seem daunting at first, don’t worry – we’ve got you covered with a step-by-step guide to installing shower wall panels. In this article, our experts will take you through the entire process, from preparing the walls to applying the panels and adding finishing touches. You’ll learn all the tips and tricks to ensure a seamless installation that not only enhances the appearance of your bathroom but also guarantees long-lasting performance. So, whether you’re a DIY enthusiast or simply want to understand the installation process before hiring a professional, this guide will provide you with all the guidance you need to successfully install shower wall panels.
Benefits of using shower wall panels
Did you know that wall panels can be set up up to five times more rapidly than conventional tiles and do not have any grout lines? This means no more scrubbing! In this article, we detail all the fantastic benefits of shower wall panels.
Whether you want to revitalize your kitchen or give your bathroom a new look, wall panels can be a stylish addition to your space. Easy to maintain and stunning in appearance, wall panels can help you personalize any room.
When deciding between wall panels or tiles for your home, there are several options. Here are a few of our main reasons for selecting wall panels.
Waterproof
Shower wall panels are entirely waterproof, making them ideal for wet environments and can help prevent mold. If you use wall panels in your kitchen or bathroom, you won’t have to worry about splashes or wet environments. Waterproof wall panels are perfect for wet environments and are excellent for preventing unsightly mold from forming between tiles. This makes them a fantastic alternative to tiles. Wall panels are typically made from acrylic-coated resin stone. This durable, waterproof material is resistant to scratches and chips and won’t discolor over time, helping your bathroom look new for longer.
Easy to clean
Shower wall panels are easy to clean and maintain, and require no painting, washing, or polishing. Because they don’t use grout, shower panels require less maintenance than tiles. Wash with warm, soapy water and a soft cloth to remove water spots or soap scum. When it comes to wall coverings like tiles, you often need special cleaning products and have to take the time to periodically do tasks like grouting or cleaning mold. With wall panels as an alternative to tiles, all you need is a dilute cleaning solution and a cloth whenever your walls look like they need a clean. Wall panels are waterproof and mold-free, making them highly hygienic.
Versatile
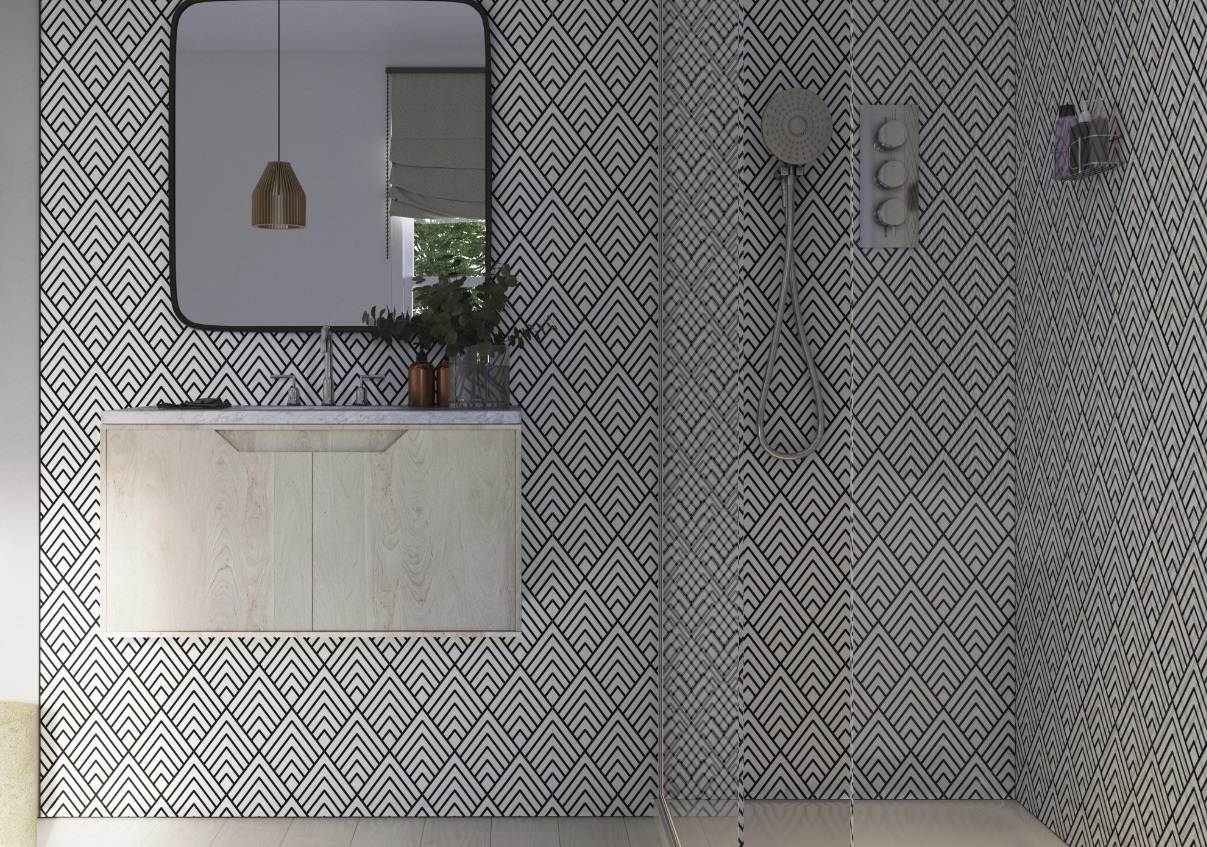
Wall panels can be used in shower enclosures or behind sinks in bathrooms, making them a versatile option. Plus, wall panels come in a variety of sizes, including full-height panels for bathrooms. Wall panels are easy to cut to size to fit any room. While tiles come in hundreds of colors, finishes, shapes, and sizes, wall panels are now increasingly available in a variety of designs. From classic white to tiled or faux wood and stone wall panels, there are plenty of options.
Durability
Shower wall panels are generally more durable than tiles and are less likely to crack or peel. They are designed to last, so you will have fewer maintenance or repair costs over time than tiles. Although shower wall panels are manufactured to the highest standards, manufacturers often offer a 10-year warranty on the wall panels.
Economical
Shower wall panels are a cost-effective alternative to tiles, as they save on material and installation costs. The cost of shower wall panels compared to tiles can vary depending on the style, color, size and finish you choose. High-quality tiles can be expensive, so shower wall panels are often more cost-effective. Tiling can also incur additional labor costs, whereas wall panels are easy to install yourself.
Can be placed over existing tile
If you’re concerned about removing tiles to create space for a tiled wall panel alternative, the good news is that wall panels can be placed directly over current tiles or on bare walls. This creates a win-win scenario when choosing wall panels.
Simple and fast to set up
Shower wall panels are quick and simple to install, and can be installed as quickly, or even faster, than painting your bathroom. Tiles take time to install, but shower panels are quicker to install. Shower panels come in large sheets that can be cut to size and do not require grouting. Just attach each panel to the wall, then seal the edges with a waterproof sealant. Shower wall panels can usually be placed over existing tile, so you do not have to remove it first. This means minimal dust and mess; also, you do not have to wait for adhesive or grout to dry before using your tub or shower.
Types of shower wall panels
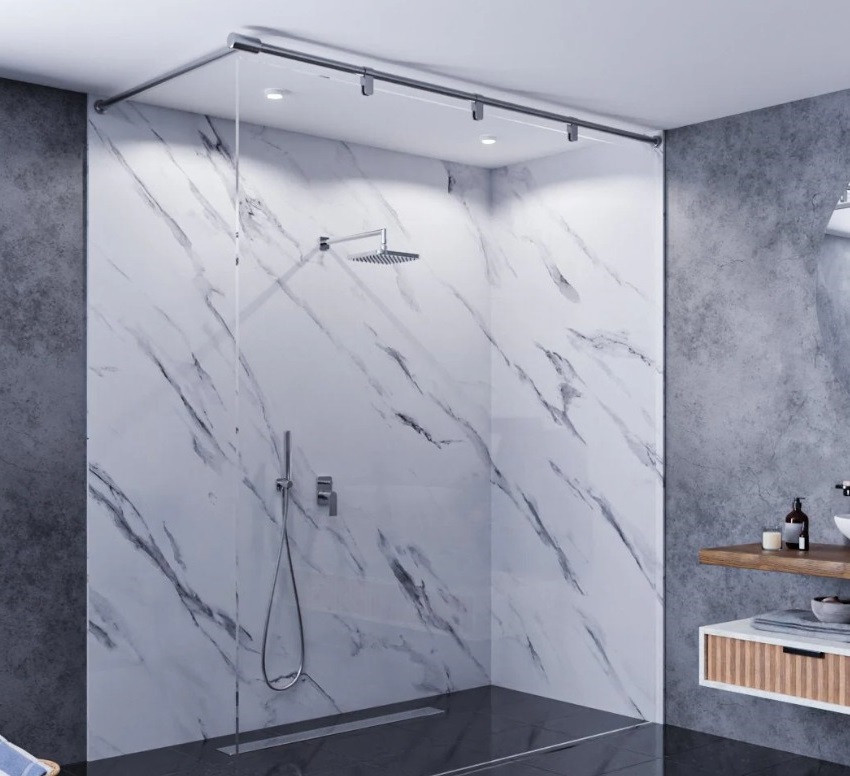
Essentially, shower wall panels are large decorative sheets that are designed to be a lightweight and easy-to-use alternative to bathroom tiles. They are capable of enduring exposure to wet and humid surroundings and are constructed to be completely waterproof.
Most are also designed to be cut to specific dimensions quickly and easily, which is one of the many reasons why they are easier and quicker to install than bathroom tiles.
While there’s no denying that shower wall panels are easier to install than tile, that does not mean they are any less attractive. Many of these wall panels are just as aesthetically pleasing as they are functional, as they come in decorative finishes that can make your shower look great.
Now, let’s take a look at each of the most popular types of shower wall panels. We will explain the unique characteristics of each type and the benefits they offer.
- PVC Shower Wall Panels
PVC shower wall panels are quickly becoming one of the most popular choices for showers because PVC as a material offers many unique benefits that make it perfect for complementing shower and bathroom walls.
Firstly, they are extremely durable yet very lightweight. Its impressive weight-to-strength ratio means that it can act as a durable barrier between the shower area and the wall behind it. It is also completely resistant to corrosion, so it will last for a long time.
Another major benefit is how easy PVC wall panels are to clean. The surface of these wall panels is resistant to mold and mildew, ensuring that your PVC shower walls stay clean and hygienic.
Finally, PVC shower wall panels are extremely easy to install, as you can quickly and neatly cut them to any shape. PVC also lends itself well to stamped textures and designs, which is why many PVC shower panels come in attractive designs, such as faux stone and tile.
- Acrylic Wall Panels
Acrylic wall panels are another attractive option for bathrooms. Like bathroom tiles, they usually have an attractive glossy finish that looks impressive in most bathrooms. For those who want a more contemporary and luxurious look, a shower or tub surround with acrylic panels can give a clean and uniform look to the entire bathroom. This is why they are a popular option for hotels, high-end fitness clubs, and community centers.
Like almost all types of wall panels, acrylic wall panels are almost always easier to install than tile, since they do not require grouting, which can be time-consuming and tedious. Unlike FRP and pure fiberglass wall panels, acrylic won’t scratch or discolor, so it’s also a better long-term solution.
Acrylic panels do have their drawbacks, though. First of all, they are quite expensive. Even the most basic acrylic wall panels are notably more expensive than PVC or FRP wall panels. They also have to be installed over a backerboard or waterproofing, which means they’re more labor-intensive to install than other shower wall panels.
If you’re concerned about the higher price tag and more difficult installation process, the sophisticated look of acrylic wall panels may be worth the price.
- Fiberglass Reinforced Plastic (FRP) Panels
FRP panels are a practical option for shower wall coverings. An advantage of these panels is their lightweight nature, which makes them easy to install.
These panels usually come in large sheets and can be cut to fit the dimensions of your shower. Their ability to be shaped easily is beneficial during installation.
Unfortunately, FRP panels are prone to scratching, especially during installation. Additionally, many users have reported that the color of these panels fades over time. Due to these issues, they may not be the best long-term solution, especially for those who are particular about design. They are also less suitable for high-traffic shower facilities, as frequent use can cause wear and tear.
However, they are quite affordable, making them a useful option for those seeking a cost-effective alternative to ceramic shower walls. They are also suitable for temporary shower facilities, college dorms, and other projects where appearance is not a top priority.
- Medium Density Fiberboard (MDF) Laminated Shower Wall Panels
These shower wall panels are made of MDF and coated with a waterproof vinyl layer. Laminated MDF panels are similarly affordable to PVC and FRP wall panels.
The grooved exterior of laminated MDF wall panels makes it easy to slide one panel over the next, simplifying the installation process. Although they are affordable and relatively easy to position and install, they are somewhat vulnerable to moisture, particularly if the vinyl surface is scratched or nicked. Because of this, they may not be the ideal long-term solution, especially in high-traffic shower facilities.
Tools and materials needed for installation
Tiling your shower walls can be a challenging and time-consuming task, but not anymore with these fantastic panels! The installation of shower wall panels is much simpler than traditional tiling methods, as they do not necessitate grouting or special tools. Plus, they can be easily installed over existing tiles, making the process even easier.
In this article, we will take a look at what you will need in terms of materials and equipment before you start installing your shower wall panels.
To install your shower wall panels, you will need the following tools and materials:
Measuring tape: Use this for accurate measurements before cutting your shower wall panels. Make sure you measure precisely to avoid ending up with too much or too little when installing.
Fine-tooth saw or sharp utility knife: These are for cutting the panels to size. A sharp cutting tool is essential for precise cuts and to avoid gaps between the pieces.
Water level: Use this to ensure that the panels are level before sealing them in place.
Silicone sealant: This is for sealing the joints and edges of the panels.
Adhesive: You’ll need a waterproof adhesive suitable for wet environments.
Caulking gun: Use this to apply the sealant and frame the panels.
Safety glasses and gloves: Protect your eyes and hands from injury.
Pencil: Use this to mark where to cut the panels.
Hole saw: This is for marking and drilling where the valve or shower head will fit through the side panels.
You may also consider purchasing a shower wall installation kit, which may include everything you need. When cutting the panels, it’s best to cut slowly until you’re comfortable with the level of resistance.
Preparing the walls for installation
Shower panels are a practical and appealing option for improving the look of your bathroom. They come in various colors, styles, and finishes, offering ample choices to help you achieve your desired bathroom style. These versatile panels can significantly enhance your bathroom, and their installation is straightforward if you know how.
Shower panels can be applied to different surfaces to create a smooth, high-quality finish. It is crucial to ensure that the surface is adequately prepared before starting the installation process.
The preparation method will vary depending on the condition of your existing wall and whether it is plasterboard, tile, or another type of finish. Shower panels can be installed on any surface, provided the wall is properly prepared. Below, we will guide you through the process of preparing your shower walls for panel installation.
- Installing over plasterboard
This is the most common surface for installing shower panels and is also the most straightforward to work with. Follow these steps to ensure a seamless installation:
Ensure the Plaster is Dry: If your walls have recently been plastered, ensure that the plaster is completely dry before installing the panels. This typically takes about 2-3 days to dry, preventing moisture buildup behind the panels, which could lead to mold.
Check for Wall Levelness: Before installation, use a spirit level to check the levelness of your wall. Since the panels are of high quality and premium design, they will not bend due to significant unevenness. Measuring the wall beforehand will help ensure a tidy finish.
Remove Uneven Bumps/Patches: Address any uneven areas using a solvent-free adhesive. Apply additional adhesive to problematic areas, such as cracks or holes, which should be sanded down after filling. Smooth out any rough patches on the plaster as well. This ensures that the panels have a sturdy, flat surface to adhere to, preventing them from buckling or cracking.
- Installing over existing tiles
Tiles are a popular choice for bathroom finishes. To save time, mess, and the expense of hiring someone, shower panels can be installed directly over ceramic tiles using silicone adhesive. Prepare non-porous surfaces, such as tiles, by following these steps:
Ensure the Tiles Are Crack-Free: Before installing the panels, ensure that your existing bathroom tiles are smooth and free of any missing tiles. If any tiles are missing or heavily damaged, the shower wall will need to be plastered to create a suitable surface. This also applies to other non-porous finishes.
Ensure the Tiles Are Clean: Use sugar soap to clean the tiles and remove any residue that could cause uneven installation and mold growth. This creates a smooth surface with good grip for the panels. Allow the tiles to dry for at least 2 days or 48 hours.
- Installing on rough surfaces:
If the wall surface is unsuitable for direct panel installation due to cracks or other issues, you can prepare the wall by installing a wooden batten structure. This method is more commonly used outside the shower area on the surrounding walls of the bathroom.
Measuring and cutting the shower wall panels
Wet wall panels are an affordable and practical way to add a luxurious look to your bathroom. They are completely waterproof, making them ideal for bathrooms and showers. One of the biggest advantages of PVC panels is that you can install them with minimal tools or experience.
Once you have ensured that the surface is suitable for installation, plan how you will cut the panels:
Measuring the wall
The first step is to accurately measure the space where you want to install the panels. Use a measuring tape to measure the exact length of the wall. If your wall is long enough to only accommodate one panel at one end, we recommend cutting the first wall panel in half during installation to create a more balanced look.
Once you have taken your measurements, here are some essential things you will need to have when preparing to cut your bathroom wall panels:
- A flat, sturdy surface to cut on, to avoid mistakes while cutting
- Adequate space for cutting the panels, as a tight space may affect your movement when cutting, leading to unintended cuts.
- Safety glasses if you’re using power tools
- A pencil to mark your panels
After obtaining accurate measurements and determining the necessary amount of panel trimming, there are various methods to consider based on the cutting tool you plan to use:
Using a fine-toothed saw
A popular method for cutting wall paneling involves using a fine-toothed saw. To prevent nicks, it is advisable to cut with the decorative side of the panel facing up when using a fine-toothed saw. While a handheld saw offers control, cutting too quickly can result in an uneven edge. For optimal results, cut slowly. Prior to making the final cut, it is recommended to practice on some panels or scrap wood to ensure familiarity with the saw.
Using a tenon saw
A tenon saw produces a highly stable cut. Slow cutting with a tenon saw can yield clean, sharp lines for your panels. For individuals with limited tools, a tenon saw is a cost-effective option for this project, particularly suitable for DIY beginners. Using a tenon saw can make it easier to adapt your panels to fit around irregular windows, doors, or bathroom fixtures.
Using a jigsaw
Another option for cutting PVC wall panels is to use a jigsaw if a fine-toothed saw is not available. In this method, place the decorative side of the panel facing downward. The orientation protects the design most effectively as the jigsaw’s teeth cut more on the upward stroke. Employ a fine-toothed saw blade and practice cutting several times to master the appropriate speed and pressure.
Using a miter saw
A miter saw provides precision and power for cutting through multiple wall panels simultaneously. To effectively utilize a miter saw, install a blade specifically designed to produce a smooth cut in materials such as PVC. Standard blades that come with saws are often too coarse for cutting PVC and result in rough edges that require extensive sanding.
Using a circular saw
Unlike a miter saw, a circular saw is portable and handheld rather than stationary. With a circular saw, you have a high level of control over the motion. For increased precision and speed, utilize a rail with your circular saw. A circular rail saw operates similar to a large guillotine, facilitating accurate and swift panel cutting. When using a circular saw, employ a fine wood blade.
Using a Stanley knife
Using a Stanley knife to cut wall panels is a straightforward and cost-effective option for individuals without a complete set of tools. Draw a straight line directly on the decorative surface of the panel at the cutting location. Carefully trace the line with the cutting tool, ensuring to keep the blade away from your hands and face. You should be able to easily cut the panel along the line.
Installing the shower wall panels
Pre-Installation Preparation is a crucial step in the installation of waterproof shower wall panels. Before commencing installation, it is essential to accurately measure the area, prepare the walls, and dry-install the panels.
Accurate Measurements – Measure the area where the panels will be installed twice prior to installation to guarantee precision. Accurate measurements are vital to ensure proper fit and appearance upon completion.
Preparing the Wall Surface – Prepare the wall surface to ensure it is clean, flat, and even. Any bumps or uneven areas on the wall should be smoothed out before beginning installation.
Dry-installation – Dry-installation is pivotal when installing shower wall panels, as it enables verification of the fit of each panel before applying adhesive and sealant. This ensures that all panels fit appropriately and appear as intended upon completion.
Now that you have completed all the necessary preparations, you are ready to commence installation.
- Installing Internal Corner Trims
Installing internal corner trims is a crucial step in the installation process of waterproof shower wall panels. Follow these steps:
Cut the inside corner trim to the desired panel height using a fine-toothed handsaw. First, measure and mark the trim to ensure precision.
Place the inside corner trim on a flat surface and apply adhesive to the outer edge of the trim.
Position the inside corner trim against the wall and apply pressure to secure it in place.
Note: The internal trim has an 18 mm cavity; therefore, when installing the panel to an internal corner, the panel needs to be cut accordingly.
- Marking and Cutting the Wall Panels
Marking and cutting the wall panels is a crucial step in the installation process. Adhere to these guidelines to ensure a successful installation:
Utilize a tape measure to gauge the top, middle, and bottom of the wall where the panel will be installed.
Use a pencil and spirit level to mark pencil lines on a non-decorative surface of the panel, transferring these measurements to the panel.
Carefully use a fine-tooth saw to cut the panel along the marked lines.
Trim the tongue or groove to ensure a snug fit when installing the wall panel into the trim.
- Installing the Wall Panels
The installation of wall panels is a simple process. Follow these steps:
Apply a generous amount of Wall Panel Adhesive to the wall. It is recommended to use 1.5 tubes of adhesive per wall panel.
Position the wall panel onto the wall and apply even pressure to smooth out any air pockets.
Repeat this process for each panel.
- Installing the End Cap Trim
Installing the end cap trim will give the installation a polished look. Follow these steps:
Measure, mark, and cut the end cap trim to the desired height of the wall panel using a fine-toothed saw.
Apply adhesive to the back of the trim and snap it into place. The end cap trim should be positioned directly behind the panel.
- Sealing the Gap with Silicone
Sealing the gap with silicone is essential to prevent water from seeping behind the panel. Follow these steps:
Coat all gaps around the fixtures or fittings with silicone as necessary.
Allow to dry according to the manufacturer’s instructions.
That’s it! You have now successfully completed the process of installing your waterproof shower wall panels.
Maintenance and care for shower wall panels
Bathroom wall panels not only enhance the look of your space but also act as a protective barrier against moisture and mold. However, without proper care and maintenance, they can quickly accumulate dirt, soap scum, and other unsightly stains.
Here, we’ll guide you through step-by-step instructions on how to effectively clean bathroom wall panels using simple and affordable household products. From removing stubborn stains to preventing future build-up, our expert tips will leave your bathroom sparkling clean and fresh.
Importance of Cleaning and Maintaining Bathroom Wall Panels
Proper cleaning and maintenance of bathroom wall panels is crucial for several reasons. Firstly, regular cleaning helps preserve the overall appearance of your bathroom. Over time, dirt, dust, and soap scum inevitably build up in these areas. Consequently, this can cause the panels to appear lackluster and unattractive. Therefore, regular cleaning ensures that the panels remain in top condition, thereby enhancing the aesthetic appeal of your bathroom.
Additionally, bathroom wall panels are often exposed to high humidity and temperatures, making them prone to mold and mildew growth. Mold poses a health risk and can damage the panels and compromise their structural integrity. To maintain a healthy and hygienic environment in your bathroom, it’s important to keep your wall panels clean and prevent mold growth.
Lastly, regular cleaning and maintenance can extend the life of your bathroom wall panels. To prevent long-term damage to the panels, it’s important to remove dust, dirt, and stains. With proper care, your wall panels can maintain their durability and functionality for years to come.
Common Issues with Bathroom Wall Panels
Bathroom wall panels can encounter various problems if not properly cleaned and maintained, such as:
Stains and discoloration: Over time, wall panels can develop tough stains and unsightly discoloration due to the accumulation of dirt, soap scum, and hard water deposits. These stains can be unsightly but are difficult to remove if not dealt with promptly.
Mold and mildew growth: The high humidity levels in your bathroom create an ideal environment for mold and mildew to thrive. If left untreated, mold can spread rapidly and cause damage to your panels and your health.
Peeling and warping: Excessive moisture and improper maintenance can cause panels to peel or warp, resulting in an uneven and unattractive appearance. Peeling panels also create gaps for moisture to enter, worsening the problem.
Recommended Cleaning Products for Bathroom Wall Panels
Mild Detergent: Begin with a gentle, non-abrasive detergent designed for cleaning bathroom surfaces that is suitable for the specific material of your wall panel, such as acrylic, PVC, or laminate.
White Vinegar Solution: Vinegar is a natural and efficient cleaner that can eliminate stains and sanitize surfaces. Mix equal parts white vinegar and water in a spray bottle and use it for cleaning the wall panel.
Baking Soda Paste: To tackle tough stains and dirt, create a paste by combining baking soda with water. Spread the paste on the stained area, then let it sit for a few minutes before using a soft brush or sponge to scrub.
Remember to test any cleaning product on a small, inconspicuous area of the wall panel before applying it to the entire surface. This will help ensure that it will not cause damage or discoloration.
Step-by-Step Guide to Cleaning Bathroom Wall Panels
- Prepare the area: Clear the bathroom of all personal items and clean the area around the wall panel. This will simplify cleaning and prevent accidental damage to your belongings.
- Dust and vacuum: Start by dusting the wall panel using a microfiber cloth or soft brush to remove any loose dirt or debris. Follow up by vacuuming the panel to ensure a thorough clean.
- Apply a cleaning solution: Spray your chosen cleaning solution onto the wall panel, starting at the top and working your way down. Let the solution sit for a few minutes to help remove any dirt or stains.
- Scrub gently: Use a soft brush or soft sponge to gently scrub the panel in a circular motion. Give special attention to areas with dirt or stains. Avoid using abrasive materials or scrubbing too hard, as this can damage the surface of the panel.
- Rinse thoroughly: After scrubbing, thoroughly rinse the wall panel with clean water to remove any remaining cleaning solution. Use a damp cloth or sponge to wipe away any dirt or soap residue.
- Dry the panel: Finally, use a clean, soft, dry cloth or towel to thoroughly dry the wall panel. This will prevent water spots and streaks, leaving the panel looking clean and shiny.
Precautions for Maintaining Bathroom Wall Panels
In addition to regular cleaning, there are a few precautions you can take to help keep your bathroom wall panels clean and long-lasting, including:
Make sure there is proper ventilation in your bathroom to decrease humidity levels. Use a fan or open a window during and after a hot shower to allow excess moisture to escape.
Clean after each use: After showering or using the bathroom, wipe down the wall panels with a clean cloth or squeegee to remove any water droplets or soap scum that could cause stains or mold growth.
Avoid harsh chemicals: Try to refrain from using any harsh cleaning chemicals that could damage the surface of your wall panels. Choose natural or mild cleaning solutions instead of harsh ones to maintain the panels’ integrity.
Regular inspections: Periodically inspect the wall panels for signs of damage, such as peeling, warping, or cracking. Address any issues immediately to prevent further damage and ensure the longevity of your panels.
Conclusion
Installing shower wall panels is relatively straightforward for anyone with basic DIY skills. The key to success lies in accurately measuring and preparing the area, dry fitting the panels before installation, and following all manufacturer-provided instructions.
Following these steps and using the appropriate tools will have your walls looking flawless in no time! Proper care and maintenance of your shower wall panels will ensure they last for years, providing you with the peace of mind that comes from investing in something beautiful yet durable.