Thinking of installing new tiles for your kitchen floor but feeling a bit overwhelmed by the process? Look no further! In this guide, we will offer you expert advice to ensure a successful installation of kitchen floor tiles. Tiles have the potential to completely change the appearance and atmosphere of your kitchen, but the installation process can be challenging if you’re not adequately prepared. From selecting the appropriate type of tiles for your space to properly preparing the surface and achieving a smooth finish, our professionals have you covered. Whether you’re an experienced DIY enthusiast or a first-time tile installer, we will guide you through the step-by-step process to avoid common mistakes and achieve professional-looking results. We will also emphasize practical tips such as accurately measuring the area, choosing the right adhesive, and sealing the tiles for long-lasting durability. Don’t let the idea of installing kitchen floor tiles overwhelm you. With our expert guidance, you can confidently take on this project and enjoy a beautiful, functional, and stylish kitchen flooring. Let’s begin!

Importance of a well-installed kitchen floor tile
Undoubtedly, the kitchen is the focal point of your home. From learning to cook to engaging in intimate conversations or assisting the kids with homework, families spend a significant amount of time gathered around the kitchen sink or table. From preparing meals on a daily basis to organizing and hosting holiday meals and events, the time spent in this area plays a crucial role in your family’s life.
The flooring in this area experiences more wear and tear than most other areas of your home, so choosing a flooring option that is durable, long-lasting, and easy to clean is crucial.
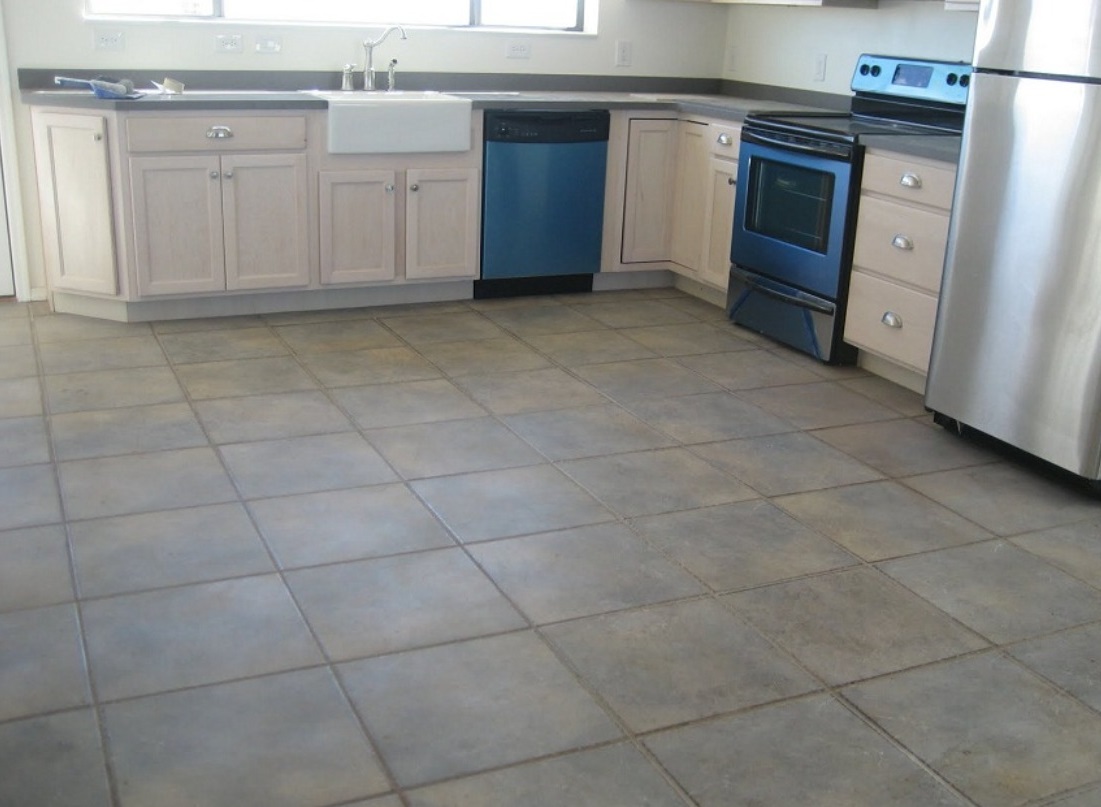
Because the kitchen is such a vital space, it’s essential to create a kitchen design that is both functional and stylish. Installing ceramic tile flooring is one way to achieve this, thanks to the endless possibilities and advantages of this versatile material.
Installing tile flooring in your kitchen provides numerous benefits for this high-traffic space:
Tile Flooring Advantages
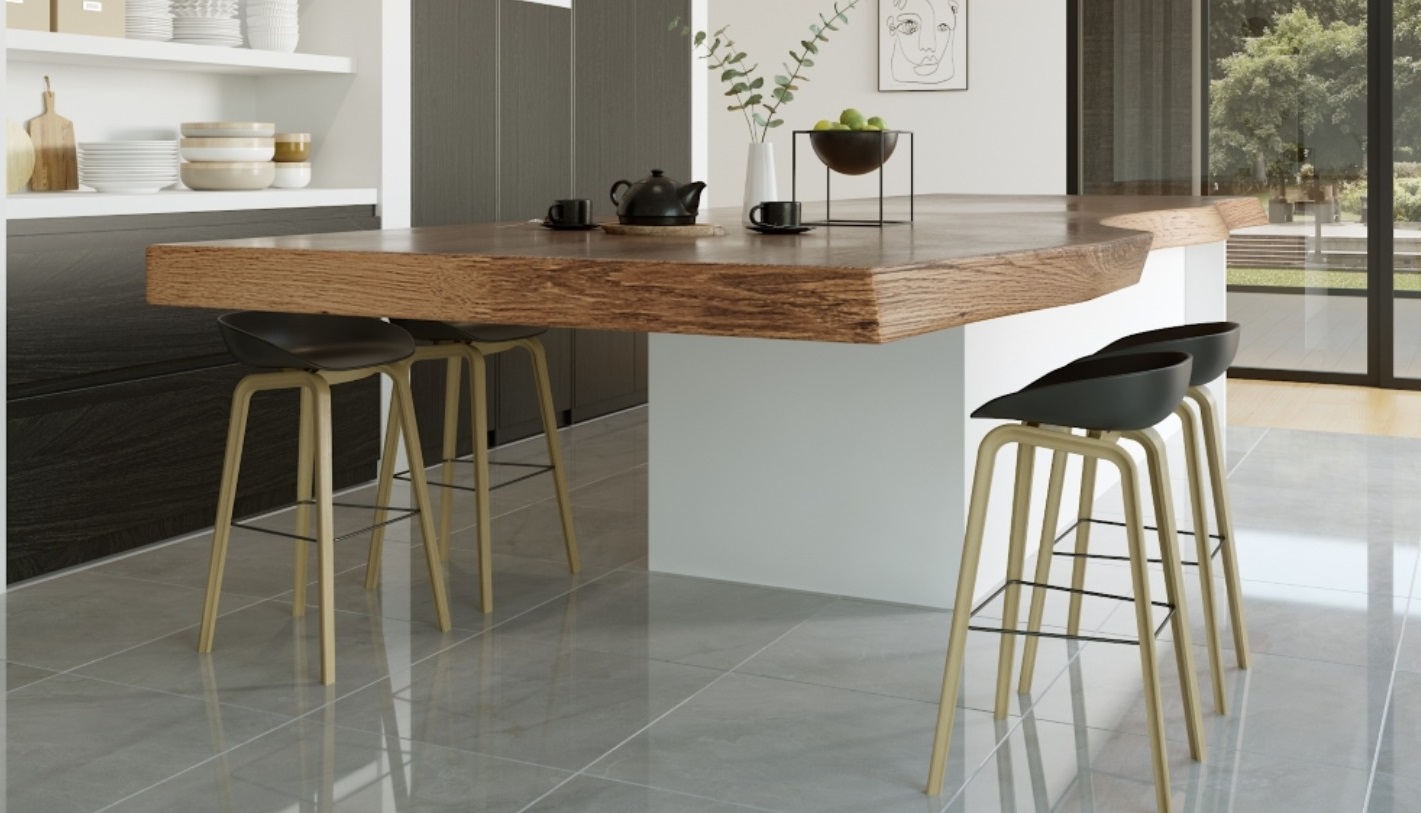
Ceramic tile flooring is fashionable. You can find ceramic tiles in a variety of colors, patterns, textures, and materials. Regardless of your home decor, you can find a tile solution that meets your design requirements. If you prefer a modern style, consider white porcelain or ceramic, something that is not overly textured, just clean and sophisticated. Think about ceramics in neutral tones but with some color variation for a more traditional design, such as natural stone.
Although tile is suitable for most designs, it is also a robust and enduring material, making it ideal for family environments, even those with pets. If you are contemplating other flooring materials, take the time to understand the benefits of tile.
- Long-lasting
Ceramic tiles are resilient. You don’t have to worry about foot traffic or children and pets running around. While many homeowners favor wood floors and similar materials, they are prone to scuffs and scratches, particularly from pets.
Ceramic tiles are not as easily scratched as most other materials. Additionally, if a pet or something else does scratch the surface of the ceramic, most ceramics will conceal the imperfections due to their natural texture. Ceramic tiles are durable and perfect for family kitchens.
When it comes to long-lasting flooring options, tiles are exceptional for their ability to withstand heavy loads and are durable. Crafted from robust materials like ceramic, porcelain, or stone, tiles are resistant to scratches and dents, making them ideal for high-traffic areas like kitchens. In areas susceptible to moisture, such as bathrooms, the non-porous nature of tiles prevents water damage and mold growth, ensuring a lasting investment.
- Easy to Maintain
Tile flooring provides a practical solution for high-traffic areas due to its low maintenance requirements. Regular sweeping and mopping help maintain its shine without much effort, saving time and money in the long run. Periodic deep cleaning, with a focus on grout lines, can restore the floor’s shine. Advanced grout sealers help prevent discoloration, making it easier to maintain the original ceramic appearance.
If tiles become damaged or stained, they can be replaced without having to replace the entire floor, making tile flooring a cost-effective option for homeowners. With its low maintenance and durability, tile flooring offers an easy solution to keeping your home looking its best.
- Ceramic tiles have a lifespan of over 50 years if properly cared for and maintained. However, with high-quality tiles and professional installation, the average lifespan is 30 to 50 years, and with lower-quality tiles and professional installation, it is 20 years. DIY installation may not result in the same lifespan due to common basic installation mistakes made by homeowners trying to save money.
- Tile is particularly advantageous for kitchen renovations as it is resistant to moisture and heat, making it ideal for areas prone to spills and equipped with heat-producing appliances like ovens. Unlike hardwood, tile flooring is impervious to water and heat damage, making it the most robust flooring material available.
- Ceramic tiles are a popular choice for kitchens and bathrooms due to their hygienic benefits. Their waterproof surface prevents the growth of bacteria and mold, common in damp areas. Cleaning ceramic tiles is easy with standard solutions, unlike the special methods required for carpets or certain types of wood. Spills can be quickly wiped up, reducing stains and germ buildup. For allergy sufferers, tile is ideal because it does not trap allergens like dust or pollen. Regular sweeping and mopping keeps surfaces free of irritants, creating a healthier indoor environment. Tile flooring’s easy maintenance and sanitary features allow homeowners to focus on everyday life rather than constant maintenance, driving its popularity in both new construction and renovations.
- Tile flooring provides limitless design possibilities for the home, with a wide range of colors, patterns, shapes, and sizes available. Homeowners can customize their space to suit their unique style preferences, from rustic terracotta to elegant marble-like porcelain. In the kitchen, bold patterns can serve as focal points, while neutrals provide a subtle backdrop for other design elements. In the bathroom, muted hues and intricate mosaics create a private oasis, enhancing the mood of the space. Accent tile features, such as inlay designs or borders, add a sense of distinction to a remodeling project, delineating different areas within a space. These customizable features reflect personal style and vision, making tile more than just a practical flooring option. The adaptability of tile flooring allows it to complement any interior trend, from minimalist to ornate, seamlessly blending character and durability into any space. Designers appreciate tile for its ability to enhance both aesthetics and functionality.
- Investing in tile flooring can significantly boost the resale value of a home. Durable, stylish, and easy-to-maintain tile is often considered an upgrade, especially in key areas like kitchens and bathrooms. Buyers are usually willing to pay more for a home with ceramic tile due to its long-lasting appeal. Tile’s timeless quality ensures it appeals to a wide range of potential buyers, unlike flooring options that simply follow a particular trend. This universal appeal is important for resale value. Additionally, tile’s energy efficiency, which stays cool in warm climates, can lower indoor temperatures and reduce cooling costs, making it appealing to environmentally conscious buyers. Ceramic flooring is a strategic investment that enhances the visual appeal and economic value of a property. Its durability, style, and energy-saving features make it a smart choice for homeowners who plan to stay or sell.
In general, the benefits of ceramic flooring—from durability and cleanliness to design flexibility and added property value—provide compelling reasons to use it in kitchens and bathrooms. Ceramic tile flooring is available in various finishes and styles, with porcelain and ceramic being the easiest to maintain, requiring little to no additional maintenance aside from general care. Natural stone, while equally durable, may require extra care and maintenance, such as resealing, and is susceptible to stains.
Choosing the right type of kitchen floor tile
When selecting kitchen floor tiles for your project, it’s crucial to prioritize considerations about usage and appearance. Picking the right tile can ensure that you’ll have a stylish and long-lasting kitchen floor for years to come, while choosing the wrong tile can result in frustration, increased costs, and the need for re-tiling in extreme cases.
Thankfully, selecting the optimal floor tile for your kitchen is quite straightforward, as long as you take into account these five factors:
- The Appropriate Tile Type
Selecting a tile that suits your project space is a fundamental consideration. For kitchens, the best type of tile should have a non-slip surface, be durable and resistant to chemicals, and have low porosity.
Porosity refers to the presence of pores, similar to the pores on your skin, which are tiny holes or gaps in a material that can absorb liquids and odors. Tiles with low porosity are best suited for kitchens, as they are easy to clean and won’t retain odors or stains when food and liquids are spilled.
Porcelain tile is an ideal choice for kitchens as it can fulfill all the criteria for the type of tile you’re seeking. Porcelain can be coated with a non-slip surface, is one of the most durable tile materials, and has very low porosity, making it easy to clean.
If you prefer a more natural look, specific types of natural stone tiles may be a better option. Stone can be a practical choice for your kitchen as long as you choose a type that is durable and has low porosity, making it easy to clean and maintain.
- Color Considerations
When choosing the best tiles for your kitchen design, color is a significant factor to consider. The color of your flooring can alter the ambiance of your kitchen in various ways. Warm, earthy colors can create an inviting and cozy feel, while cool or white colors can impart a clean and spacious feel.
However, it’s important to bear in mind that your kitchen is a workspace, not just a place for decoration. While cool and white colors can make a room feel clean, darker colors actually conceal stains and dirt more effectively and are easier to maintain a clean appearance over time.
- Selecting the Best Texture
Decorative kitchen floor tiles can have a substantial impact on the visual appeal of a room, but it’s essential to remember that the texture of the tile determines its performance in everyday use. Glossy porcelain floors may look impressive, but they tend to become slippery quickly during cooking.
Non-slip properties are particularly important for kitchen tiles, especially if you do a lot of cooking or have a kitchen that remains steamy or humid throughout the day. Therefore, tiles with a matte or textured finish are generally preferred.
- Natural Stone Care
Natural stone is a popular choice for residential flooring. However, it’s important to keep in mind that natural stone requires special care. While you should always choose natural stone with low porosity to prevent stains, all types of stone are prone to scratches and clouding from dirt and grime. Walking on a dirty natural stone floor can lead to scratches over time because dirt is often abrasive.
Therefore, it’s crucial to regularly sweep natural stone tiles and take measures to prevent people from tracking dirt into the room. Installing a long “dirt-catcher” rug in the hallway leading to the kitchen is usually a good idea. Additionally, be sure to install floor protectors on furniture legs that could scratch the floor, and always use a pH-neutral floor cleaner to safeguard the natural stone surface.
- Grout Size and Color
Grout size refers to the width of the visible joints between tiles. Grout size significantly affects the visual appearance of your kitchen, and it can also be colored to achieve your desired aesthetic. However, bear in mind that grout tends to become dirty over time, so darker grout will effectively conceal inevitable stains better than lighter grout.
Preparing the kitchen floor for tile installation
To get your kitchen floor ready for tile, keep in mind that these fundamental steps are relevant for all types of floor tiles, including those used in kitchens, bathrooms, mosaics, stones, ceramics, porcelain, and more. If you’re new to tiling, it’s better to start with floor tiling than a backsplash. Tiling walls requires more skill due to the vertical nature and the effects of gravity.
No step-by-step guide can cover every aspect. Each project is unique, and you may encounter situations not addressed in this or any other tiling tutorial. Nevertheless, following these steps will generally lead to successful project completion.
Prepare the Subfloor This step is crucial. It’s the most important step. First, let’s understand what a subfloor is. It’s the floor beneath the finished floor. There are two main types of subfloors: wood and concrete. Both are susceptible to the same issue that can damage tiles: movement. Wood can expand and contract due to moisture and temperature changes; concrete can shift due to factors like humidity, air, soil movement, and temperature.
Pier & Beam House: Wood Subfloor Remove all staples, over-drilled screws, or nails. Install cement backer board to create a solid base for your tiles and prevent cracking due to tile or grout movement.
The backer board is attached to the wood subfloor using backer board screws and secured with tile adhesive mortar to the plywood subfloor. Remember to apply tape and seal the joints between the backer board pieces. A crack-prevention membrane is applied to both surfaces. This membrane also serves as an airtight seal and is beneficial in wet areas, on second floors, or for plywood subfloor applications. Use a notched trowel to apply the mortar at a 45-degree angle to the plywood subfloor.
Concrete Subfloor For concrete subfloors, ensure all old adhesive is removed, and fill any cracks with the appropriate product. Use a floor scraper to eliminate loose debris. You may need to put in some effort and possibly use a grinder to remove old adhesive or mortar from the concrete floor to allow the new mortar to bond. Tile flooring can be installed directly onto concrete. Regardless of the subfloor type, ensure it is clean and free of debris.
Determine Your Starting Point and Lay Pattern Planning your tile layout and positioning fixtures and cabinets is crucial to minimize waste (less cutting!) and ensure a smooth installation process.
There are various patterns to choose from, although some are better suited for specific tile shapes and sizes. Herringbone, brick bond, and basket-weave/parquet patterns have gained popularity in recent years. You should decide on these patterns before choosing your tiles. But if you’re using traditional square tiles, linear or grid patterns won’t shift over time and are easy to install. These are tiles laid side by side in the pattern you have in mind as you read this. That’s it.
Determine your starting point in the room. Generally, you’ll want full tiles in the most visible or focal areas of the room and cut tiles near cabinets or less visible walls. Measure the room to find the center point and draw a chalk line on the floor to guide the installation. Ensure there is equal space on both sides so that you don’t end up with full tiles on one side and partial or cut tiles on the other. Every room is different, so take your time and plan accordingly. The objective is to cover as much floor space as possible with tiles and leave extra space around obstacles, under appliances, and along outside walls.
Sometimes, centering a room may not be the best layout for your floor tile application. You would start in the room’s center if it’s a simple rectangle or square, similar to the diagram above, and if it’s the only room being tiled. For instance, a wide-open square or rectangular room, such as an open-plan dining room or bedroom.
When working in a kitchen, it’s important to consider the entire room rather than just the center. Typically, whole tiles are placed in the transition area to the adjacent larger room, such as the living room, while cut tiles are used for the walls and cabinets.
The process of installing a new kitchen floor is made easier when you have a smooth, level subfloor and a tile underlayment. Additional preparation work may be necessary for concrete or wood subfloors.
According to experts, homeowners who adhere to these general preparation guidelines tend to have the best success rates:
Concrete – Lightly roughen bare concrete to open the pores for strong adhesion. Address any uneven areas and clean and prime the surface before tiling.
Plywood – Ensure the plywood has an intact moisture barrier. Replace any sections that have been damaged by water.
Existing subfloor – Remove the old subfloor if it is not suitable as a substrate. Scrape off any excess adhesive and sand any uneven areas to create a level surface.
Moisture – Test the moisture level of your floor, especially when working with concrete. Sealing may be required before tiling if there is excessive moisture.
Grout lines – Establish reference grid lines on the subfloor to use as a guide when aligning tiles to ensure consistent grout line spacing.
Allow all leveling compounds to fully dry before tiling. Always carefully follow the instructions provided by the adhesive manufacturer during the installation process.
Tools and materials needed for the tile installation process
Whether you’re a professional tradesperson or a DIY enthusiast, having the right tile installation equipment is crucial for a smooth installation and achieving a professional finish.
The tools and materials needed for tile installation include:
Tile spacers: Small, cross-shaped plastic pieces used to space tiles during installation.
Trowel: Used to evenly spread mortar along the base of the tiles.
Grout float: Rubber pad with a C-shaped handle used to fill the spaces between tiles with grout.
Tile cutter: Rectangular platform with a cutting wheel used for cutting glazed tiles.
Tile nippers: A tool used to nibble small pieces of tile, similar to pliers.
Grout sealer: Essential for preventing moisture from entering through the grout and under the tiles.
Tape measure: A staple tool for accurate measurements.
Thin-set mortar: A mixture of cement-based powder and water that helps tiles adhere to surfaces.
Tile saw: A stationary saw that uses a diamond-coated blade and water to cut tiles.
Step-by-step guide to installing kitchen floor tiles
Before you begin, ensure you have enough tiles for the job. Measure the width and length of your kitchen, and multiply the measurements to calculate the square footage. Add an extra 10% to account for any chipped tiles or mistakes.
The steps for installing kitchen floor tiles are as follows:
- Cut the tile membrane to the required size
Place the membrane with the fur side down, and mark the subfloor at the membrane’s edge to determine where to apply the thinset. Use a mileage cutter to cut around any pipes.
- Apply and spread the mortar for the tile membrane
Prepare the unmodified thinset. You’ll know it’s the correct consistency when you can pull the trowel out and the ridges remain upright. Work on one section at a time to prevent the thinset from drying out before you can install the membrane. Spread the thinset evenly over the floor using the smooth side of the trowel. Then use the notched side of the trowel to spread the mortar.
- Install the tile membrane
Unroll the membrane and press it into the thinset using a wooden float. Continue working in sections, applying mortar and then the membrane.
- Waterproof the membrane seams
To waterproof the seams, use waterproof tape. Apply a thin layer over the membrane and use a trowel to apply the tape, ensuring at least a 2-inch overlap at each seam. Seal the seams between the membrane sections and along the walls. If your kitchen has finished walls, you can seal the entire length of the wall with caulk or a sealant designed specifically for your membrane instead of tape.
- Establish a starting point for tile installation
First, create reference lines for the tiles. Begin by measuring two opposite walls and draw a chalk line between their midpoint. Repeat this process for the remaining walls. This will establish a starting point. You can use hairspray to make the chalk adhere to the membrane.
- Check the tiling layout
Test the layout by dry-installing the tiles and use tile spacers to ensure the expansion gaps are correct. Leave a 1/4-inch space along the outer edges for expansion. Mix tiles from different boxes to maintain consistent color throughout the room. If you end up with small tile pieces at one end, you can adjust the layout to provide a wider edge for the tile. Remember to create a new reference line if you make adjustments to the layout.
- Prepare the tile mortar
Mix additional unmodified thinset until it has the consistency of peanut butter. Start in the center and evenly spread the mortar, ensuring any gaps in the membrane are filled. Just like before, work on one section at a time to prevent the thinset from drying out before you can install the tile. Apply the mortar at a 45-degree angle using the notched edge of the trowel.
- Begin tiling
Position the first tile on the reference line in the center of the room, slightly rotating it as you press down to ensure complete adhesion. Lay the tiles along the reference line, leaving gaps between each tile. Periodically lift a tile to confirm full contact with the thinset. If needed, apply mortar to the back of the tile for better coverage.
- Clean and smooth the tiles
Use a damp sponge to remove any loose debris from the tile surface. Occasionally check for high spots using a long distance gauge, and carefully use a rubber mallet to level them out. Remember to maintain a 1/4-inch gap at the room’s edges and around pipes.
- Cut the tiles as necessary
For simple cuts, a tile cutter works well. Use a handheld tile cutter for curved cuts, and a tile hole saw for creating holes. If you anticipate a lot of cutting, consider using a wet tile saw, which will expedite the cutting process.
Common mistakes to avoid during tile installation
Installing tile is a significant investment in any renovation project, and starting off correctly is crucial for a satisfactory and long-lasting outcome. To ensure a smooth tile installation, here are some common mistakes to be aware of during and after installation:
- Overlooking Surface Preparation
Before laying floor tiles, it’s essential to prepare the subfloor. Remove any existing coating or residue to ensure a smooth, clean surface. This step is critical for establishing a strong bond between the tiles and the floor, preventing future issues such as loose or cracked tiles.
- Grouting Prematurely
Patience is important when it comes to grouting. It’s crucial to wait until all tiles are in place and the adhesive has fully dried before proceeding with grouting. Premature grouting can lead to uneven drying rates, resulting in an irregular appearance and reduced durability.
- Incorrect Adhesive Application
While it may seem convenient to apply adhesive in dots at the corners of the tiles, this is a common misconception. Uneven adhesive application can lead to tile chipping or cracking over time. To ensure a strong bond, spread the adhesive uniformly over the back of the tile and the installation area using a tile trowel.
- Using the Wrong Adhesive
The right adhesive can significantly impact the longevity of your tiling project. It is important to always choose an adhesive that is appropriate for the specific purpose of the area. For areas with high humidity levels such as bathrooms or pool areas, opt for a waterproof adhesive to prevent moisture damage.
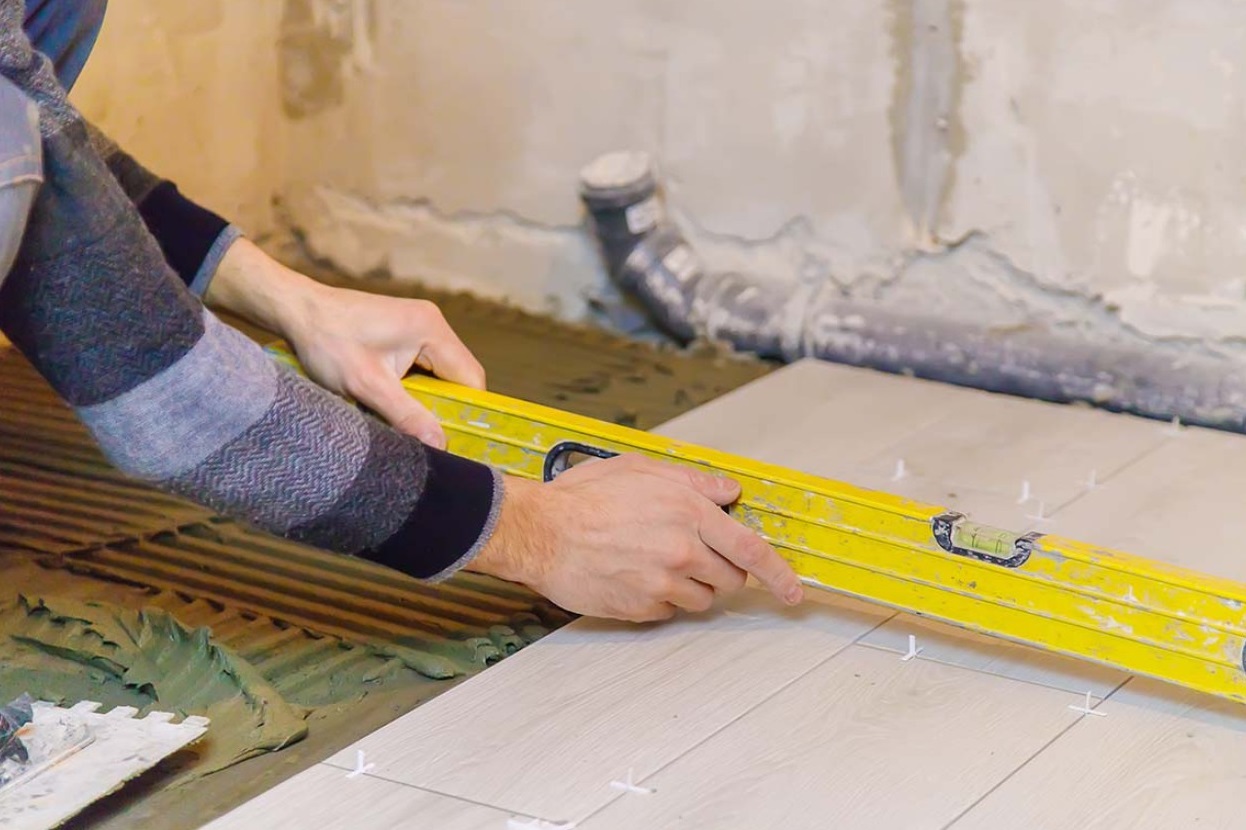
- Ensure the Floor is Level
To achieve a smooth and even tile installation, it’s important to use a floor leveler during the process. While it may seem like an extra and time-consuming step, using a floor leveler helps the tiles stay in place while the adhesive sets, reducing the chances of uneven floors. Uneven floors not only affect the appearance but can also pose a safety risk to occupants due to tripping hazards from slanted tile edges.
- Purchase Sufficient Tiles
When estimating the number of tiles needed, it’s advisable to buy more than the calculated amount. This additional allowance, typically around 10% to 15%, accounts for potential damage during installation, wastage from cutting, and any miscalculations. Having extra tiles on hand ensures that replacements are available if needed in the future, and they can also be used for other purposes.
- Promptly Clean Excess Grout
Although some excess grout is inevitable during the application process, it’s crucial to clean it up before it fully dries. Delaying the cleaning process can make it challenging to remove the grout, as it hardens when it dries, potentially leaving unsightly streaks on the fresh tile surface that are difficult to clean.
- Use Gentle Cleaning Solutions
After tiling, it’s necessary to clean the tile floors to remove fine dust and excess grout. While some force may be required, it’s important to avoid using harsh chemicals to expedite the cleaning process. While ceramic and porcelain tiles are durable, using aggressive cleaning chemicals can damage the surface and diminish the design. Most household cleaners are suitable for use on tiles. However, if stronger chemicals are needed, it’s best to seek professional advice regarding the appropriate products to use after tiling.
By avoiding these common tiling mistakes, you can ensure a successful tiling project that not only looks great but also lasts a long time.
Tips for ensuring a long-lasting and durable tile installation
Here are some tips for ensuring a long-lasting and durable tile installation:
- Use quality adhesive
High-quality tile adhesive is essential for the longevity of your tiling project.
- Measure and cut carefully
Utilize a tile cutter or wet saw to create accurate cuts. Double-check your measurements to avoid wasting tiles.
- Level the tiles
Keep all tiles level as you install them.
- Plan the layout
Draw a detailed floor plan to ensure the tiles are centered correctly and positioned precisely.
- Use a tile trowel
A tile trowel helps spread mortar evenly and smoothly along the base so the tiles adhere securely.
- Seal the tiles
Use a tile sealer to protect the tiles from stains, moisture, and wear and tear.
- Consider the tile size
Larger tiles are more durable and long-lasting, but they may require more concrete.
- Choose the right tiles for the installation method
Some tiles, like porcelain, can be heavy and difficult to install. Larger tiles may necessitate a sturdier subfloor and unique installation methods.
To protect your tiles after installation, you can:
– Keep them clean
– Use shower mats
– Cover them during extended use
– Keep tile seats dry
– Avoid placing heavy furniture on the tiles
– Prevent potential leaks
Cleaning and maintaining kitchen floor tiles
Remember the following guidelines for cleaning and maintaining kitchen floor tiles:
Keep your kitchen ceramic floor clean by using a vacuum cleaner or broom to regularly remove dust and dirt. This will prevent scratching and damage to the ceramic. Avoid using a straw broom, as it can cause scratches.
For regular cleaning, mix a drop of dish soap with a bucket of warm water as a mild detergent.
Thoroughly rinse the floor to ensure that all soap residue is removed and to maintain the shine of the ceramic.
To tackle tough stains, administer a mixture of baking soda and water, allow it to rest for a few minutes, and then scrub. Baking soda can also be added to the soap mixture to help break down heavy dirt and dissolve oil and grease.
For a deep clean, use a commercially available ceramic cleaner.
Scrub the grout thoroughly to ensure a clean surface.
Grout the ceramic before mopping to save time and thoroughly remove dirt.
If you choose to vacuum, remember to turn off the beater blade as it can scratch or dull the finish of your tiles.
Effective Ways to Clean Grout on Tile Floors
Focusing specifically on the often-neglected task of grout cleaning. This crucial part of tile maintenance ensures that your floors not only gleam but also remain clean and sturdy. Here are the most effective methods for cleaning grout on tile floors:
Create a Cleaning Mixture: Combine water and baking soda to produce a paste. To tackle stubborn grout stains, you can utilize a blend of baking soda and hydrogen peroxide.
Apply the Paste to the Grout: Use a small brush, such as an old toothbrush, to carefully apply the paste directly onto the grout lines. Let it sit for a few minutes, especially on areas with more noticeable stains.
Scrub the Grout: Delicately scrub the grout lines with the brush. The baking soda functions as a gentle abrasive, aiding in the removal of dirt and grime without causing harm to the grout.
Utilize a Grout Cleaner for Tough Stains: For particularly stubborn stains, you can consider using a commercial grout cleaner. Ensure that the cleaner is appropriate for your type of tile to prevent any damage.
Thoroughly Rinse with Clean Water: After scrubbing, it is essential to wash away the cleaning solution and any loose dirt with clean water. A mop or cloth is suitable for this purpose, ensuring that no residue is left behind.
Dry the Area: Use a clean, dry cloth to wipe down the tiles, focusing on the grout lines to eliminate any remaining moisture.
Seal the Grout (optional): If the grout is unsealed or if the sealant is old, think about applying a fresh coat of grout sealant. This will help safeguard the grout from future stains and simplify the cleaning process.
Mastering the most effective method for cleaning ceramic floors, particularly the grout, will significantly enhance the overall appearance and lifespan of your floor. Regular and efficient grout cleaning is crucial for maintaining the clean, appealing look of your tiles.
Conclusion: Enjoy your beautiful and functional kitchen floor
Selecting the ideal tile for your kitchen floor is a decision that extends beyond aesthetics. It involves a delicate balance of functionality, durability, and personal style. From the timeless charm of ceramic and porcelain to the natural allure of stone and the affordability of luxury vinyl, each material offers distinct advantages to meet your specific design requirements and preferences.
As you embark on the journey to create your ideal kitchen, bear in mind that tile is more than just a flooring solution; it is a medium for self-expression. Embrace natural and organic design trends, striking patterns, and innovative formats to craft a space that genuinely mirrors your personality and lifestyle.
Whether you opt for the rustic allure of terracotta, the intricate patterns of Moroccan-inspired tiles, or the sleek modernity of large-format porcelain, the key is to select a tile that will not only withstand the demands of everyday use but also enrich the overall atmosphere of your kitchen. With proper care and installation, your tile flooring will be a long-lasting investment, adding value and character to your home for years to come.