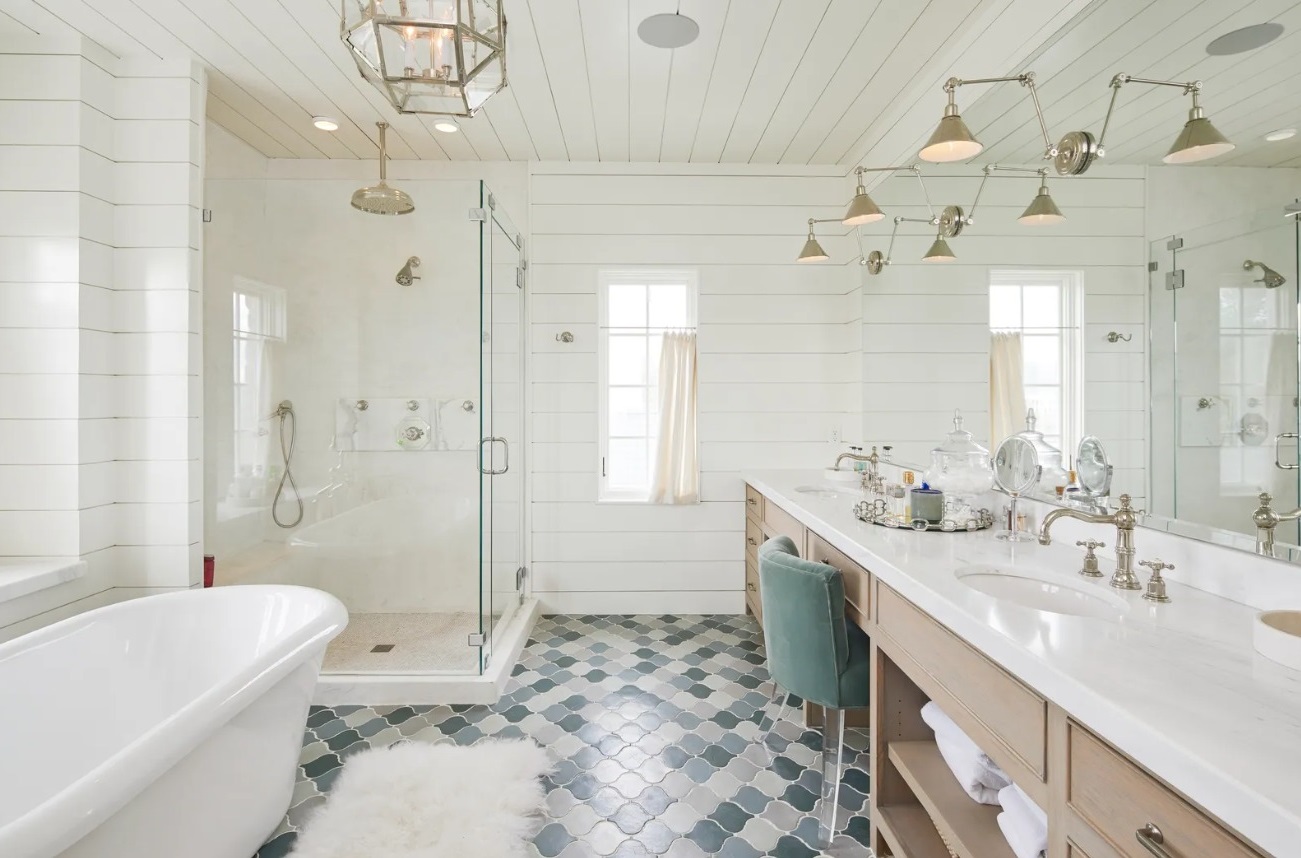
There is a lot of bathroom floor tiles design you can choose from. But paying attention to our tips below will make the design more pop up and unique. Let’s find out!

Have Reflective Surfaces
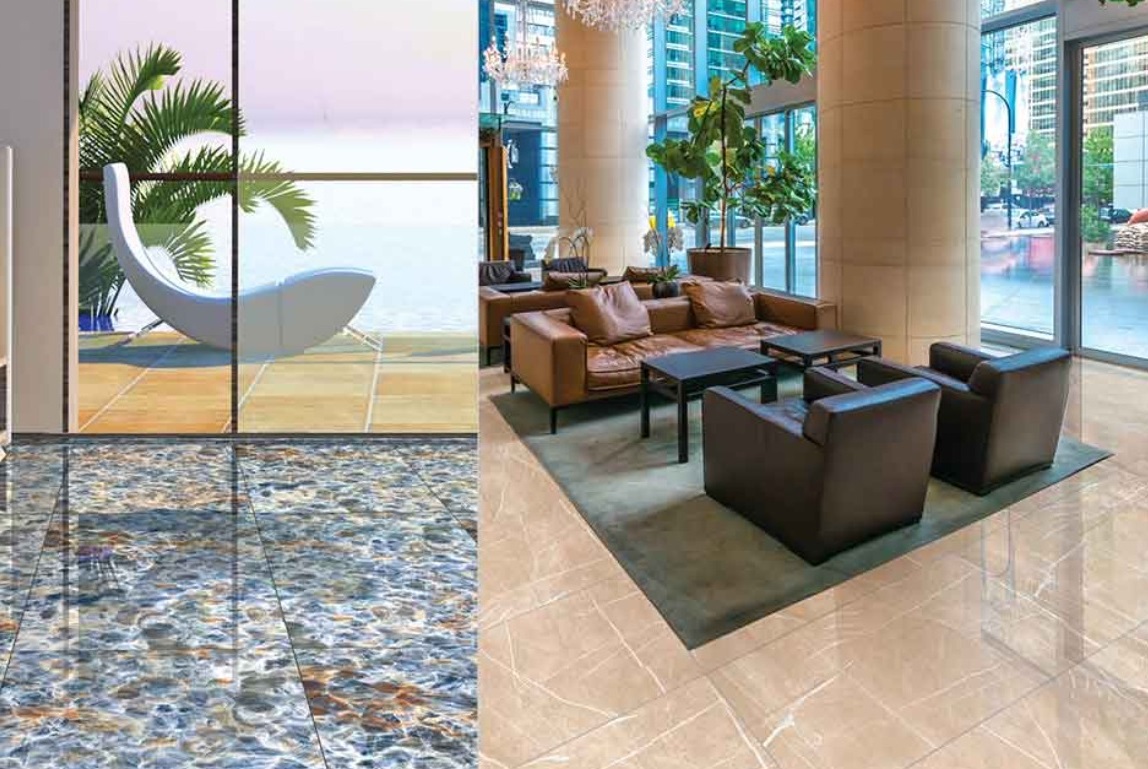
In a tiny bathroom, light has a major role in whether the room will look bigger or smaller than the actual size is. When you consider about tiny bathroom tile designs then you may want to think about tiles with mirror or glass, glossy finish. If you choose glossy finishes, it will help you to add more light to reflect around the room easily meanwhile mirrored and glass finishes will enhance the space’s feeling completely.
Consider Stone and Marble Finishes
If you want to have an elegant, beautiful look for your bathroom floors, consider stone and marble finishes. Tiles bathroom made from marbles can have a little bit gloss finish even though not all do. Bright color in this design of tile is able to provide a beautiful look. Meanwhile, the tiles made from stone are very famous in bathrooms. You should consider choosing the neutral tone stone tile which can be great for floors and walls.
Tile Floor to Ceiling
Unfortunately, tiny space can create confinement feeling so easily that can be quite unpleasant for those who have a claustrophobic. One of our recommendations is to tile the bathroom from the floor up to the ceiling with the tiles that are same so it will have a sense of continuity that is important to make the room feels more spacious and bigger. This does not only decrease the restricted feeling but also can be a nice focal point as well in your bathroom.

Conclusion
As we already gave you several choices of tiling ideas for your bathroom, now it is the time to make sure that you will get an excellent look. The key takeaway from our tips today is to choose neutral, light colors in order to avoid a cluttered feel. The tile’s size shouldn’t be a big deal even though massive tiles are perfect for bigger space. Reflective surfaces will make sure an equal light’s distribution throughout your bathroom that helps provide a sense of space. And it is perfect for a tiny area.

For the walls, you can use beautiful pattern tiles or same tile from the floor up to the ceiling to make the room feels bigger. Use a calculator to count how many tiles you need to prepare for your bathroom before you go to the store. Share our bathroom floor tiles design article to help more people like you.
The history of tiles is a meandering tale that began in Egypt around 10,000 B.C., during the time of the pyramids. The story then traversed through Babylon, Assyria, and the ancient Persian Empire. The Greeks and Romans later adopted this ancient art, creating elaborate mosaics that adorned their bath houses, luxury villas, and temples. Around 206 BC, the Chinese introduced their contribution to ceramics with porcelain. However, they remained relatively isolated from other cultures until later when Europe also embraced ceramics, incorporating them into their churches and palaces. Today, modern stone masons have elevated tile making to a true art form, similar to how it began in Egypt, allowing homeowners to explore the wonders of this ancient craft.
Tiles are individual units made of fired clay, metal, glass, or stone, used to finish surfaces on floors, walls, or ceilings. They can be used both indoors and outdoors, and can range from plain to highly decorative in terms of color, texture, and profile. This article focuses on ceramic tiles, which are made from non-metallic minerals (clays) fired at high temperatures to produce hardened tiles. Because clay is abundant globally, the production of bricks and tiles is widespread.
The beginning of tile-making was quite simple, as terracotta tiles were among the earliest to be made. Essentially, clay is shaped and then dried in the sun or fired in an oven, resulting in a terracotta tile. The name “terracotta” itself means “baked earth.” Initially, these tiles were used for roofing and were very different from the decorative tiles we know today. Examples of these terracotta roof tiles can still be found in the Mediterranean regions and in luxury homes in the United States.
The earliest instances of tile making date back to the Holy Lands around the 4th century BC. The Romans then brought tile-making to Europe through their conquests. In the 8th and 9th centuries, the Uighur people of northwestern China developed the foundation for the Turkish and Middle Eastern tiles of the 13th century, known for their geometric symmetry and botanical motifs.
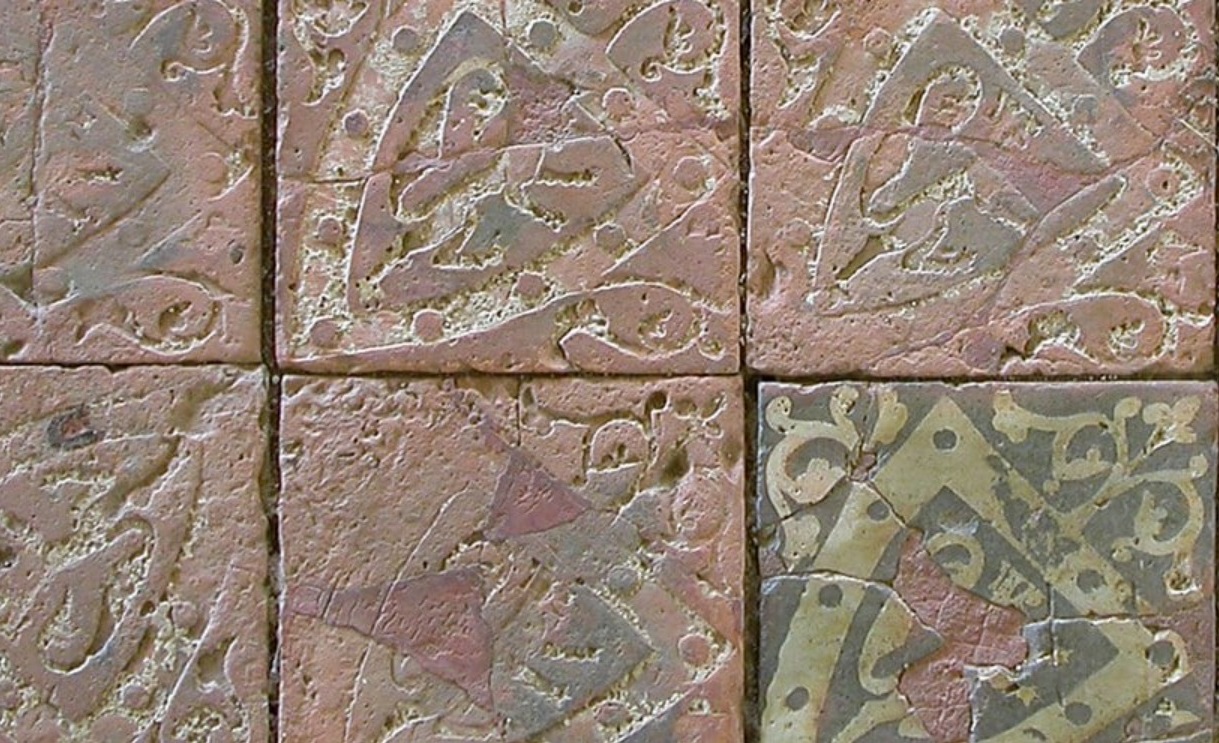
The art of tiling by the Romans declined but was rediscovered by Cistercian monks in the 12th century. They created pressed tiles with imprinted patterns in multiple colors known as encaustic tiles. Although this method was lost, it resurfaced in the 16th century and saw a resurgence in the 17th century in Turkey, as well as in Delft in Holland. In the mid-18th century, tile-making gained popularity again with production spreading throughout Europe. Herbert Minton reintroduced encaustic tile-making in England around 1843, which was later replaced by machine pressing to mass-produce tiles from drier clay. While solid color tiles were produced in Central and South America as early as the late 16th century, they were not widely used in the United States, which imported tiles from Europe until the United States began its own tile industry starting in 1870.
During the Victorian era, there was a strong emphasis on cleanliness and public health, which popularized tiles as a surface that could be easily cleaned and sanitized. Encaustic tiles dominated until the 1890s when white and colored ceramic tiles were produced, followed by variegated glazed tiles. The availability of ready-mix glazes in the 1900s enabled the production of consistently colored tiles.
Stone masons in ancient Egypt
Egyptians were the first to work with stone, creating large stone tiles inscribed with hieroglyphics and other images. They favored using granite, travertine, and limestone. The Great Pyramid was believed to have been covered in white limestone tiles, giving it a highly reflective surface. Unfortunately, the limestone was later used to construct mosques and fortresses. Today, limestone is still valued for its ability to brighten any room, as seen in modern bathrooms.
Tiles in ancient Persia and Babylon
The Babylonians demonstrated high levels of craftsmanship with their ceramic work, as seen in the Ishtar Gate from around 575 B.C. Utilizing molds, they created brick tiles with repetitive motifs, which were then glazed to produce vibrant colors. Their use of color influenced Greek and Roman art, leading to the creation of durable, visually stunning designs, still reminiscent in modern tile-making, as shown in contemporary bathrooms.
Travertine tiles in ancient Rome
Rome’s admiration for tiles surpassed even that of the Greeks. They adorned large public spaces with enduring works, prominently featuring travertine. This stone was a favorite for tile works and can still be seen in structures like the Colosseum.

Early glazed tiles in England
In the late 10th century, glazed tiles made their appearance in England, adorning churches and royal palaces. The importation of porcelain from China, mainly for tea sets, contributed to the mass production of various tile designs in Britain by the 19th century. These tiles became treasured family heirlooms, with checkerboard patterns being particularly popular.
The influence of the Arts and Crafts Movement on tile design
America began to make its mark on tile history through the Arts and Crafts movement. Tiles were incorporated into the homes of ordinary people, reflecting the movement’s celebration of handmade goods. The use of earthen tones created warm and inviting living spaces, a concept exemplified in modern bathrooms.
Properties of tiles
Typical ceramic tiles are created from clay, molded, dried, and then fired in a kiln. Clays are natural materials that vary regionally, resulting in differences in workability, color, texture, density, and porosity. Firing temperature affects the color and hardness of the tiles produced.
Penstocks can be divided into glazed and unglazed types. Glazed tiles have a colored surface and are fired, while unglazed tiles derive their color from the clay itself or from additives such as dye, pigment, or oxides. Examples of unglazed tiles include quarry tile, encaustic tiles, and mosaic tiles. Quarry tiles were originally stones cut into small units from a quarry and laid as tiles. Modern quarry tiles are made by extruding clay, cutting it into consistent thick slices, and firing them, resulting in standard squares or rectangles in earthy colors.
Encaustic tiles consist of clay bodies with a pattern pressed into the top of the tile. Liquidized clay or very thin, colored ‘slip’ is poured into the pattern to achieve the final appearance, and then the tiles are fired.
Mosaic tiles originally consisted of tiny cubes of colored stone known as tesserae, arranged individually by hand to create geometric patterns or complete pictures. In modern manufacturing, clay is used to form the individual tesserae, which are pre-arranged and attached to mesh for easier and faster installation.
Before WW II, commercially manufactured dust-pressed glazed tile production could take as long as seventy hours from start to finish. Advancements in automation led to the development of a conveyor system that took tiles through a tunnel kiln, resulting in consistently thin tiles with an even glaze. This process reduced production time to as little as two hours, significantly lowering costs and increasing availability.
The Industrial Age has led to the creation of custom wonders in the production of ceramic tiles. Instead of mass-producing or cutting tiles with diamond bits, waterjets are now used to cut tiles to individual specifications. This technology allows for the creation of unique custom works of art that were previously impossible to achieve due to the precise curves, which were challenging to produce with other tools without breaking the stone into pieces.
The evolution of tile technology demonstrates that in every age and country, tiles have been modified and improved, leading to the creation of new possibilities. From Egypt, where terracotta and limestone tiles evolved into ceramic works of art that have survived to this day, to the Romans making stone mosaics available to the public, and the British mass-producing ceramics for ordinary use, the development of waterjet technologies today enables the cutting of stone tiles previously considered miraculous. It is evident that this art form will continue to evolve as new materials and technologies transform it over time.
The typical methods for installing tiles have not changed significantly over time. Penstocks were soaked in water and laid in a mortar bed over a solid substrate of bricks or concrete. Once set, the crevices between tiles would receive a pure cement mortar, sometimes with lamp-black mixed in for color. Wood floors were set flush to the top of supporting joists when a tile finish was desired. Early in the 20th century, newer substrates such as plywood were introduced, but over time, these deteriorated with moisture and are no longer recommended by the Tile Council of North America. A modern change in installations is the use of an anti-fracture membrane and expansion joints, which were not typical in historic installations.
When it comes to maintenance, cleaning should always commence with the gentlest means possible. Sweeping, followed by warm damp mopping, may be sufficient. Abrasive or acidic cleaners should not be used. If considering any type of chemical cleaner, it should be tested on a small inconspicuous area first to ensure it does not discolor, abrade the tile, or leave etching or efflorescence behind. It is important to thoroughly wet the floor tile before applying any cleaner to fill pores with clean water, preventing deleterious chemicals from penetrating deeply.
Stains should always be identified before cleaning to prevent them from setting. For stubborn stains like oil, heel scuffs, or asphalt, a mild ammonia cleaner can be used on wet tiles and thoroughly rinsed afterwards.
Historically, ceramic tiles were typically not treated once laid, other than with wax. Caution should be exercised when considering any treatment—coating, sealant, or wax—prior to application, as these will require more maintenance than the ceramic tile alone. They can show wear and tear patterns more prominently, fester or wear off inconsistently, or pall, obscuring the beauty of the original penstocks. It’s important to ensure that any coating will not negatively impact the static coefficient of friction for slip resistance required under the Americans with Disabilities Act.
Failures and Causes
Ceramic tiles, while durable, can experience various failures.
One of the main challenges for tiles is abrasion. Although floor tiles are generally sturdy and resistant to wear, after decades of foot traffic, tiles can lose their pattern or even decrease in thickness, particularly in heavily used walkways and stair treads.
Glazes are typically as durable as the tile itself, but occasionally they may show signs of pitting or crazing. This is more commonly observed in lead-glazed tiles fired at lower temperatures in the 1800s. Crazing can trap dirt from damp mopping, and if it extends throughout the entire glaze, it can increase the tile’s porosity.
Despite being extremely hard, ceramic tiles are susceptible to breakage or chipping due to the impact of a dropped tool or the pressure from a metal wheel on a cart.
Moisture can saturate the mortar beneath the tiles, compromising the bond between the tile and the substrate, and causing mildew in the grout. Tiles with a porous substrate that are consistently exposed to moisture can spall.
Loose, popped, or unbonded tiles result from a failure of the setting bed. There are numerous causes: mortar that is too strong or not properly mixed, a substrate that flexes and disrupts the mortar bond, or strong cleaning solutions that degrade the grout, allowing moisture to reach the mortar bed.
Tiles can be damaged or dislodged due to construction activities, such as plumbing changes or wall relocations. Often, the subsequent repairs are inadequate, resulting in unsightly patches using tiles that are inconsistent in size, shape, thickness, color, or pattern.
Current Conservation Approach
When repairing historic materials, it is essential to use the gentlest and least invasive methods possible to minimize the impact on the historic fabric. When addressing these repairs, the focus should be on addressing the root cause first before repairing the observed symptoms. For the most part, tile repairs beyond routine cleaning and maintenance should be left to experts.
To prevent tile surface abrasion, regular vacuuming or sweeping can remove grit that may be ground in by carts and foot traffic. Walk-off mats can be used in areas like doorways and corridors to reduce the tracking of grit and protect heavily trafficked areas.
When dealing with glaze pitting or crazing, there are limited options. While it’s difficult to remove dirt without causing further damage, it typically does not lead to additional failure. Occasionally, a conservator experienced with the chemistry and application of such treatments can be hired to treat the glaze with a densifying agent followed by a repellent.
If moisture has damaged tiles, the source of the moisture should be addressed. If the damage is due to the loss of the mortar bed, the tiles can be salvaged and reinstalled once the source of moisture is eliminated. For mildew or mold, a diluted (5-10%) solution of TSP (tri-sodium phosphate) can be used, followed by thorough rinsing. The dwell time should be brief (a minute or two) as the alkali nature of TSP can cause efflorescence.
Removing an individual broken tile can often cause damage to adjacent tiles during replacement. Cracked tiles can be repaired using epoxy injection, while small pieces that have broken off can be re-secured with epoxy. To preserve the historic fabric, small chips can be repaired with a colored enamel mixed with epoxy, or for unglazed tiles, a tinted mortar patch.
A comprehensive approach is necessary for replacing any tiles. The cause of the damage should be identified and eliminated first.
If there are loose, popped, or unbonded tiles, it could be due to a poor substrate, lack of expansion joints, or grout deterioration. In such cases, the affected tiles can be salvaged by stiffening the substrate, using an anti-fracture membrane, and applying soft joints of colored sealants to control movement before re-laying the tiles. When individual tiles are damaged from impact, creating a tripping hazard, or are lost due to building works, they should be carefully removed without using a hammer and chisel to prevent damage to adjacent tiles. An experienced tile professional will use a hand grout saw for removal or salvaging of tiles. For grout joins broad than 3/8 ”, a diamond blade mounted in an angle grinder can be used to remove the elongate sides, while the corners are precisely minced out by hand.
The most challenging aspect of repairs is finding replacement tiles that match exactly in size, shape, thickness, pattern color, and detail. Even if attic stock is found or exact replication is achieved, the replacement tiles will not have the same patina as adjacent tiles. Historic tiles from areas out of public view can be salvaged and used in conspicuous areas where tiles require replacement, and replica tiles can then be used in inconspicuous areas.

Pros and cons of using it today:
Ceramic tiles are highly durable in the long term, and their intricate details often contribute significantly to the historical character of the structure. When it is necessary to intervene in a historic tile installation, it is best to engage professionals who are familiar with specifying and executing the required repairs. Many well-intentioned DIY efforts can result in further damage, potentially causing irreparable harm to the historical fabric.