Installing the tiles in the shower area is kind of smart and you may need to take a look at the small shower tile ideas. Putting the tiles in the wet area will prevent the moist trapped in the wall. It also protects your wall from anything that could happen due to water, moist, and things related to those things. Since you only have a limited space to be renovated, you really need to be creative with every decision you will make. Here in this article, we are going to give you the tips to beautify your small bathroom using the tiles, especially for the shower area.
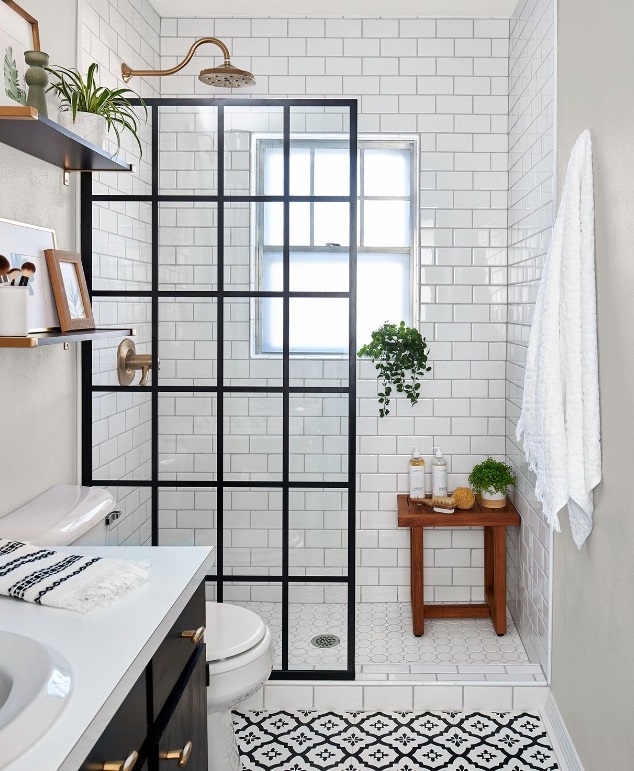
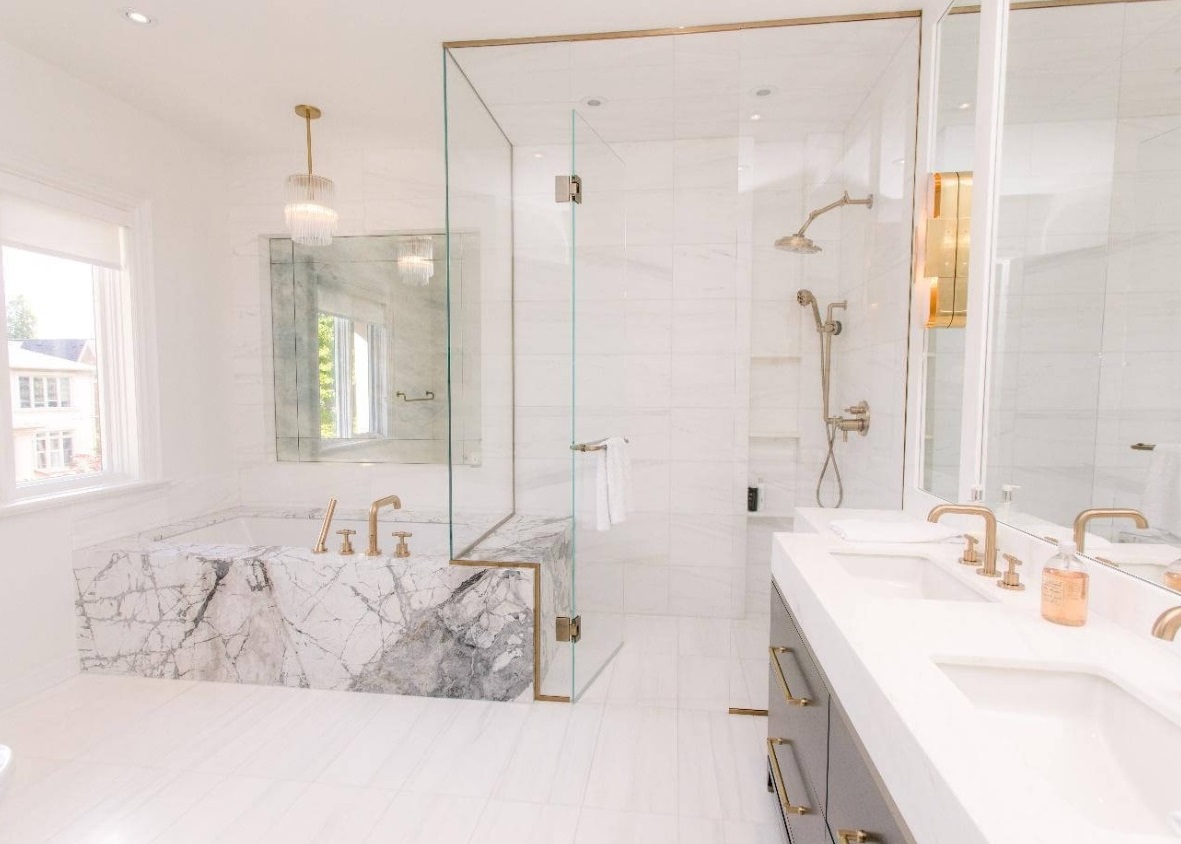
Large tiles for small bathrooms
It is the time when you need to change your mindset. A small bathroom does not mean that you have to stick with small tiles as well. Large tiles will actually create magic and trick your brain to think that space is bigger. So, if you want to wrap the shower area with tiles, you may use tiles with a large patter. Hexagon tiles might do the trick as well.
Arrange the tiles in a diagonal pattern
Many modern bathrooms have a limited yet small space to stick with. Of course, it will be a good place to start the minimalist lifestyle into the whole house. A tall mirror above the sink will help to make the room appears bigger.
Later, you can make the appearance looks even better with a subtle touch from subway tiles that are arranged in a herringbone pattern. It will draw the eyes longer than the actual space in the room. You basically need to make experiments with the tiles arrangement to find the one you like the most.
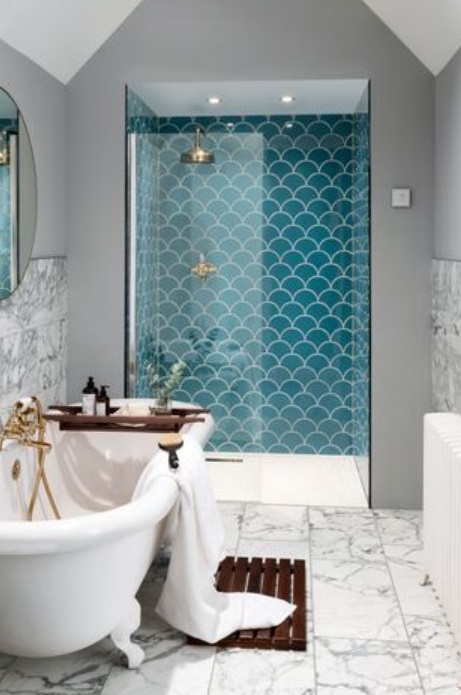
Bubblegum pink bathroom
Sometimes retro style just wins our hearts. So, you can also turn your small bathroom into a chic yet charming bathroom with a retro-inspired pink color. The pink color can be applied to the whole flooring while the rest of the room remains in white. It will draw a longer yet roomy bathroom with style. Also, the bathroom feels warmer though.
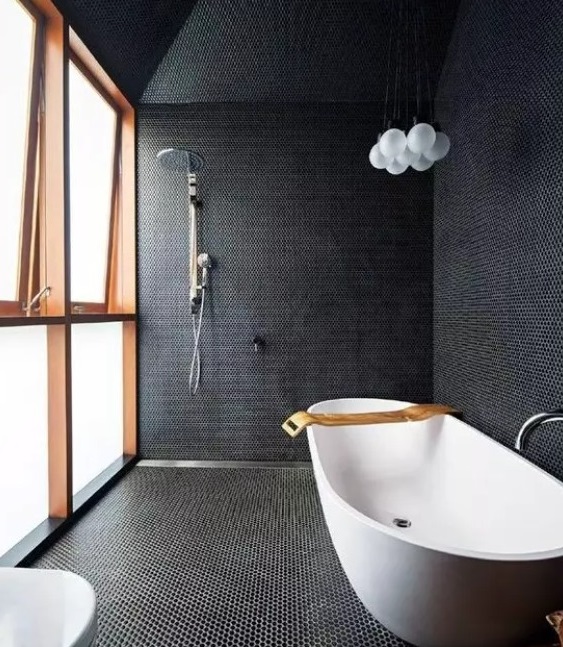
Black Tiles
If you really want something different, you may try to install hexagon tiles. Choosing black for the tiles will create a classy yet sophisticated impression in the bathroom. Other than that, if you do not want to deal with moldy wallpaper, you can try to wrap the whole bathroom (floor to ceiling) with tiles. And this is the end of small shower tile ideas.
Information on Standard Shower Sizes
An efficient guide to standard shower dimensions, varieties, and materials
Are you planning to install a new shower or renovate an existing one? Then it’s crucial to have a good grasp of the fundamentals regarding standard shower measurements and types, as well as some suggestions on how to pick the most suitable shower for your space, whether it’s a compact bathroom or a more spacious one.
Usually, the smallest shower size measures 32 inches wide by 32 inches deep. Nonetheless, the International Residential Code (which oversees houses, duplexes, and townhouses) permits showers as small as 30 inches x 30 inches. The measurements then incrementally increase, usually up to about 36 inches by 60 inches.
Your shower is a sanctuary. To ensure that you make the right choice, we’ve outlined the essential information below to help you create a serene, functional, and practical space. Continue reading for details about the various shower sizes available and factors to consider when selecting a shower unit.
Standard Shower Sizes
When designing a walk-in shower, you have plenty of flexibility in terms of size. Essentially, you can build it as large as your space allows.
However, if you opt for a pre-fabricated shower unit, you’ll be restricted to the standard sizes that are offered. The dimensions of the smallest size are generally 32 inches in width and 32 inches in depth (although the International Residential Code permits showers as small as 30 inches x 30 inches), with larger sizes increasing incrementally, usually up to around 36 inches x 60 inches.
If you are aiming to comply with ADA accessibility standards, consider a standard shower size of at least 36 inches x 36 inches.
It’s important to note that these measurements refer to the interior size of the shower, and you’ll need to account for some additional space for framing.
How to Measure for a Shower Unit
Unless you’re constructing a bathroom from the ground up, you’ll be limited by the existing available space for a shower. To obtain an accurate measurement, start by measuring the height—from the base of the floor to the top of your existing shower unit. Take measurements in two places for accuracy, and choose the larger measurement if there’s a discrepancy. Afterward, measure the width and depth of the available space.
What If You Want a Shower-Bathtub Combo?
If you desire a shower space that also serves as a bathtub, you’ll need to consider this in your measurements. The standard sizes for a shower-bathtub combination are 60 inches x 30 inches x 72 inches and 60 inches x 36 inches x 72 inches.
When determining the appropriate size, be sure not to rely solely on standalone bathtub dimensions, as shower-bathtub combo units usually tend to be slightly larger than standard bathtub units.
Types of Showers
In addition to shower size, you’ll also need to make decisions regarding the type of shower you prefer. There are four major categories to choose from, although your options may be somewhat limited based on the age and layout of your home’s plumbing system.
Mixer showers – This is the most common option, as it connects directly to your pipes, relying on your home’s system for water pressure and heat.
Electric showers – This affordable option can usually be installed in any home. It comes with a built-in element for heating water, making it quite energy-efficient, though it often falls short when it comes to water pressure.
Power showers – Also known as pumped showers, these showers have a built-in pump that can compensate for a low-pressure system. Heating and pressure are usually both ideal, but energy efficiency is low, and these showers come with a high price tag.
Digital showers – If you’re looking for the latest in shower technology, consider digital showers, which are eco-friendly showers equipped with a digital panel for controlling pressure and heat. Nevertheless, they do come with a substantial price.
When selecting a shower, there are various shower styles to think about in addition to the type of shower. Fiberglass and acrylic are the most commonly used materials in pre-fabricated shower units due to their ease of installation and maintenance, even for DIYers. Both materials have a similar appearance, although fiberglass is less expensive (and slightly more susceptible to scratching).
If you are constructing a shower from the ground up, you will have numerous material options available, such as ceramic, porcelain, stone, marble, and glass. Each material has its own advantages and disadvantages. It is advisable to conduct thorough research before making a final decision. This will enable you to fully understand the implications and ensure that the chosen material is worth the cost.
Selecting a shower is a significant decision. While size is typically the initial consideration, there is plenty of flexibility beyond that, particularly when designing a custom shower as opposed to selecting a pre-fabricated unit. Other important factors to consider include price, eco-friendliness, style, and durability. Additionally, take into account whether you prefer a shower with doors or a curtain, as this will impact the overall style.
If you are building a bathroom from scratch, it is worthwhile to invest in a certified bathroom designer, despite the additional cost.
Tiling a shower on your own is a cost-effective way to update your bathroom, typically taking three to five days to complete. Tiling is a gratifying DIY project that rewards patience and attention to detail.
Read on for step-by-step instructions on tiling a shower.
Selecting the right type of tile for a shower is crucial. The shower wall and floor tiles should meet or exceed waterproofing specifications. For the shower floor, the tile should provide sufficient grip to prevent slipping.
For the walls, porcelain tile is suitable for use in showers due to its low water absorption rate (0.5 percent or less). Most glazed ceramic tiles can also be used on shower walls. Glass tile is an excellent choice for shower walls due to its vibrant color range and nearly non-existent water absorption. It is also easy to clean.
When selecting floor tiles for the shower, it is important to prioritize maximum grip to avoid slips and falls. The coefficient of friction, or DCOF wet value, is a standard measure for rating slipperiness. The DCOF value for shower floor tile should be equal to or higher than 0.42, which is the standard for interior tiles expected to be walked upon when wet.
Tip: Tile manufacturers provide specifications for tile water absorption rates, DCOF slip resistance, break strength, and PEI abrasion resistance ratings in their product literature or on their websites.
Safety precautions should be taken when tiling a shower. Turn off electrical circuits near the shower, and wear eye, hearing, and respiratory protection when cutting tile or removing an existing shower.
Protect the bathroom floor by taping down plastic or cardboard, or by laying down thin plywood boards. Ensure that the floors outside of the bathroom are also protected while removing debris.
When removing old shower tiles, work from the top down using a prybar and hammer. Remove any screws and nails as you go. Only allow a few tiles to accumulate in the shower pan before placing them in a bin to prevent slippery conditions.
Tip: If cement backer board is present and in good condition, keep it for your tiling project. It may be damaged during tile removal, but some sections may remain intact. Direct-to-stud enclosures will not have cement board or drywall behind them.
- Repairing the Structure of the Shower Wall
Ensure that the framing of the shower enclosure is stable, dry, and free from mold and mildew.1
In older houses, the wood studs might have decayed and may need replacement.
Some houses may have drywall or greenboard behind the tile or plastic surround. It is not advisable to tile over drywall in a shower. These materials should be removed.
If there is moldy fiberglass insulation, it should be removed and ideally replaced with spray-on foam insulation.
- Adding Seating, Storage, and Compartments
Construct seats, built-in shelves, niches, and cubbies to enhance functionality and maintain a clean look in the shower. These accessories can be built from scratch or using pre-made items.
To create built-in features and seats, build the item using two-by-fours and then cover it with 1/2-inch cement backer board.
Cover the joints with fiber-based tape and apply a layer of thinset.
Apply a waterproof membrane and tile these items along with the rest of the shower.
Pre-Made Shelves
Pre-made shelves are made of polystyrene and come pre-sloped. They are ready for tiling and do not require cement board, taping, or liquid waterproof membrane.
- Measuring and Marking the Shower Area
Measure each wall to find the horizontal and vertical center. Mark these locations.
Use a chalk line to establish the center of each wall by snapping it between all the marked points.
- Installing the Backer Board
Measure the area that needs to be covered with the backer board.
Cut the backer board by scoring it with a utility knife, bending it back, and lightly cutting the back.
Use a hole saw fitted to the drill to cut holes in the backer board for the plumbing fixtures and showerhead.
Fasten the backer board to the studs using concrete screws.
Apply cement board tape to every seam between cement boards.
Using the flat side of the trowel, embed thinset mortar into the tape and smooth it down.
- Applying Waterproofing Membrane
Use a paint roller to apply the waterproof tile membrane onto the cement backer board. Pay close attention to the joints.
The drying time is approximately 1 to 2 hours but can be as long as 12 hours, depending on the conditions.
Apply a second coat.
- Creating a Story Pole
Place a scrap two-by-four against the side of the tile on the floor and mark each grout point on the story pole.
Lay the tiles for each wall on the floor in the intended wall pattern, including the plastic tile spacers.
Arrange the tiles so that they start at the center strike points and move symmetrically outward.
What Is a Story Pole?
A story pole is a temporary layout tool. Based on the project measurements, it locates and standardizes positions on the work area.
- Establishing the Start Point for the Second Row of Tiles
For now, leave the first row above the edge of the shower pan without tiles. Consider using full-size tiles at the topmost point, as this is a visible section.
Place scrap one-by-two boards horizontally above this empty first row, plus a seam above and 1/4-inch below.
Secure this board in place with screws.
- Spreading Thinset
Mix the thinset mortar until it reaches a consistency similar to peanut butter.
Use the notched side of the trowel to spread the thinset on the cement board. Start from the bottom of the shower and work upward.
Rather than applying the thinset to the entire shower at once, work in small areas. Large sections may dry before you can apply the tile.
- Installing the Tiles
Press the tiles into the thinset by gently wiggling the tile from side to side. Be careful not to apply too much pressure and begin working from the bottom up.
Remove the starter board for the second row.
Tile the first row, making necessary cuts to fit.
Place the edge tiles along all exposed edges of the field tile.
Tip
After placing the first tile, inspect the back of the tile and the cement board to evaluate coverage. If you are not seeing enough thinset, switch to a 1/2-inch notched trowel.
- Placing Tiles Around the Drain
If you’re using a pre-built shower pan, you don’t need to tile around the drain since the pan doesn’t require any tiling. Use a tile nipper to cut the tiles near the drain to fit the shape.
- Applying Grout to the Tiles
Once the thinset or mortar is dry, which usually takes about two days, apply grout to the tiles.
Use the edge of a rubber grout float to spread the grout over the tile surface.
Drag the grout diagonally across the tile, filling in all the gaps.
After the grout is dry, which typically takes about three days, seal the grout in the shower by using grout sealer.
- Removing Grout Haze
After the grout has dried, clean the grout haze from the tiles using grout haze cleaner.
Mix the cleaner with water in buckets and wipe the tiles with sponges.
Constructing a Shower Pan
You have the option to construct a shower pan from scratch using tiles and mortar or use a pre-built shower pan.
Tiled pan: Build the shower pan using shower floor tiles, layering mortar to create a slope that directs water towards a central drain. This method provides creative freedom and a sleek look but comes with a higher risk of water leakage.
Pre-built pan: For easier installation, use a pre-built single-piece fiberglass or acrylic shower pan. The appearance is simple and functional, with a significantly reduced risk of water leakage.
Cost of Tiling a Shower
The cost of tiling a shower primarily involves purchasing tiles. Tile prices vary from $1 per square foot for basic glossy white subway tiles to $50 to $75 per square foot for designer artisan tiles. Expect to spend approximately $5 to $10 per square foot for tiles. Setting materials will cost an additional $4 to $6 per square foot.
Tips for Tiling a Shower
Tiling a shower is a significant project for most DIYers, so consider these tips to make the process smoother:
Take your time: Allocate enough time to work at a steady pace.
Arrange an alternative shower: Prepare backup bathing facilities before starting the tiling process.
Store materials in a different place: Use a spare bedroom or empty hallway to store building materials rather than the bathroom.
Inspect for any damage: Immediately open the tile boxes to check for any damage and return them to the store if necessary.
Store items correctly: Store large sheets such as backer board and plywood vertically. Store tile boxes flat and avoid overloading the stacks.
When to Seek Professional Help
Tiling a shower requires precise craftsmanship since it involves managing large amounts of water with no room for error, and making cuts for corners, sides, and the drain can be time-consuming and challenging. It is crucial to construct a perfectly dry tiled shower, and the finished product should be examined to ensure that waterproofing is done correctly. If you feel that you do not have the time, patience, or skills to successfully complete this project, consider hiring professionals.

Where to Begin Tiling a Shower
When tiling a shower, start by installing the tile in the second row from the bottom. The shower base may not be level, so the tiles need to be cut to fit into the last horizontal row before the floor.
Is Tiling Your Own Shower Easy?
Tiling a shower is relatively simple, but waterproofing a shower is more challenging. You need to install a moisture vapor barrier behind cement backer boards, which are then coated with waterproofing membrane paint.
What to Do Before Tiling Your Shower
Before tiling a shower, you should install the substrate on the studs to create a flat and stable surface for tiling. The substrate usually consists of cement board or cement backer board.
Should I Tile the Walls or Floor First in a Shower?
You can start by tiling either the walls or floors first. Some tile installers prefer to tile the floor first so that the tiled walls overlap the floor. Others prefer to tile the walls first to avoid damaging a newly tiled floor with falling tools, tile, and mortar.
How Soon Can I Use the Shower after Tiling?
Wait for 48 to 72 hours after installing new tiles before using the shower. This allows enough time for the grout and any sealant to dry.
Should You Tile Under a Shower Tray?
Tiling under a shower tray can result in an uneven surface and is not recommended.